Star Wars Spotlight: Showdown on the Smugglers’ Moon
Our heroes reunite to battle more than one monster and make a shocking discovery!
Each week Star Wars Spotlight combs through the digital archives of Marvel Unlimited to showcase one classic story from that distant galaxy filled with Jedi, Sith, princesses, scoundrels and droids.
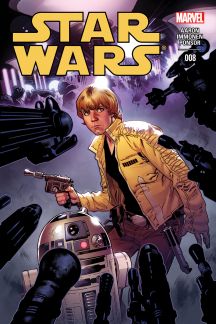
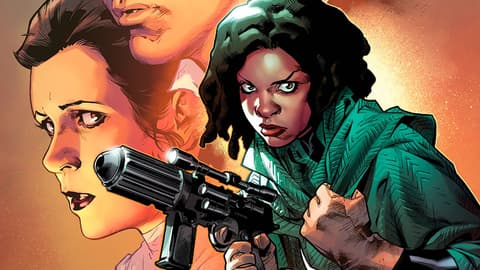
Instead of taking it easy after the events of the first Jason Aaron-penned arc of STAR WARS, our heroes continued their planet-hopping exploits in issues #8–12. The first issue of the Stuart Immonen-drawn arc picked right back up with Han and Leia facing down the barrel of a blaster on an unnamed outer rim world the former thought might work as a Rebellion headquarters.
On the other end of that blaster? A woman named Sana claiming to be Han’s wife! After some craziness with a batch of TIE Fighters and the destruction of their ship at the hands of Sana, Han and Leia figured out a way to team up and get out of there.
Meanwhile, Luke decided he needed to get to the Jedi Temple on Coruscant. However, as the former Republic capital then served as the seat of the Empire’s power, young Skywalker realized he needed to sneak onto the planet which meant he needed a crew.
Trying to recreate the magic he found at Mos Eisely, Luke and R2-D2 traveled to the Smuggler’s Moon of Nar Shaddaa to put a team together. Instead, he wound up as the latest piece in Grakkus the Hutt’s extensive collection of Jedi memorabilia. Instead of freezing him in carbonite, though, Grakkus sent Luke into his gladiator training program.
Eventually word got back to Mon Mothma and the leaders of the Rebellion about Luke’s capture. Knowing she couldn’t send a large number of soldiers into a place like that, the Rebel leader relied on a pair of hardcases to get the job done: Chewbacca and C-3PO.
While Han, Leia, and Sana made their way to Nar Shadda, Chewie and Threepio faced off against Dengar the bounty hunter and Luke made his gladiatorial debut against Kongo the Disembowler, a tech-enhanced beast that made the Rancor look soft and cuddly by comparison. Thanks to a well-timed bust by some Imperial forces because of an undercover agent in Grakkus’ midst, the good guys joined forces, wielded lightsabers, and fought their way off planet to relative safety!
From the Jedi Temple Archives
Take a close look at the pages of STAR WARS #9, specifically the ones featuring Grakkus’ Jedi collection. In addition to all of the Holocrons and lightsabers, peep the mask that looks like it belonged to a Jedi Temple Guard as seen towards the end of “Star Wars Rebels” season two and beyond. Also, check out the Ahsokka Tano projection from one of aforementioned Holocrons saying, “Whoever is seeing this…it’s up to you now. Don’t let our deaths have been in vain. Don’t let this be the end of the Jedi.”
Next time, we work our way into one of the most dastardly gangsters in the cosmos’ gangs with a series of mid-90’s Jabba one-shots!
The Daily Bugle
Can’t-miss news and updates from across the Marvel Universe!
