Absolute Carve-age: Jack 'o Lantern Designs Inspired by Venom, Carnage, and Scream
Turn your Halloween squashes into startling symbiotes!
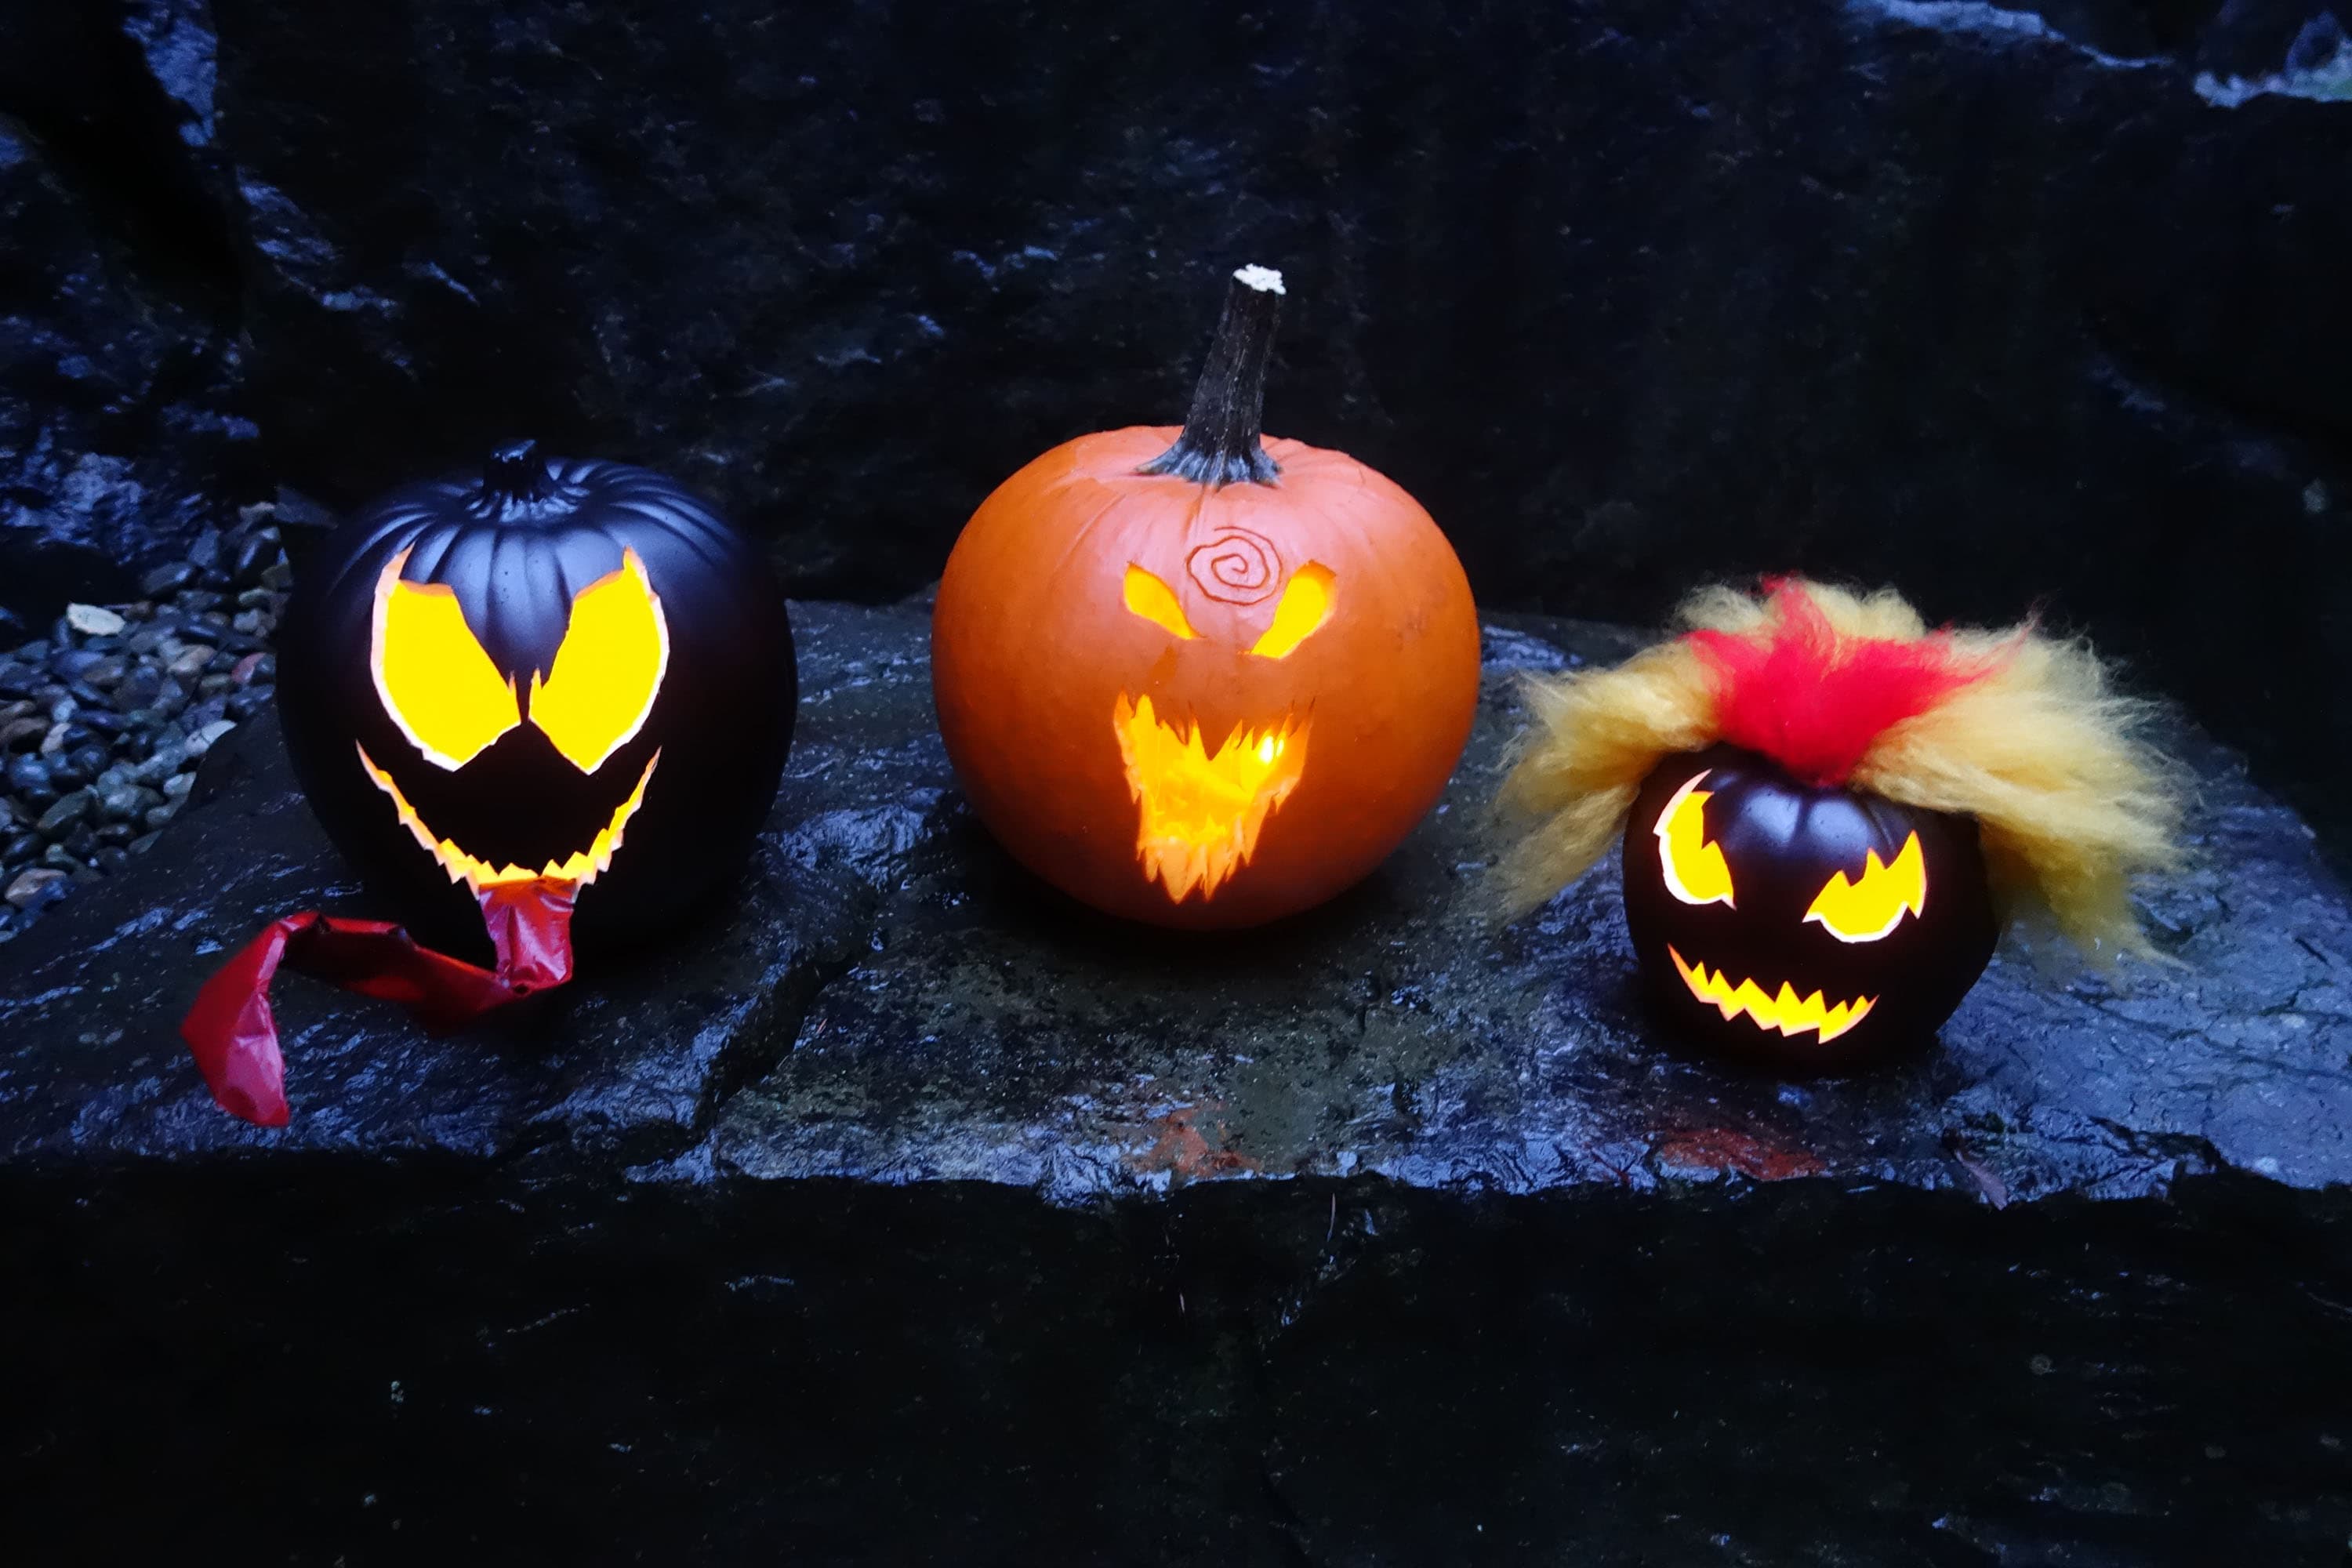
Symbiotes are invading the Marvel Universe in ABSOLUTE CARNAGE, and this Halloween they can take over your front porch as well! Carnage, Venom, and Scream are not only fearsome forces to be reckoned with, they make the perfect pumpkins for a spooky night. Here’s everything you need to carve a symbio’ lantern this Halloween.
Note: Do NOT use an open flame or lit candle in the plastic craft pumpkins. They are flammable!
What You’ll Need
- Medium-sized black craft pumpkin or real carving pumpkin
- Pumpkin carving tools or craft knife
- Tape
- Chalk
- Pushpin
- Pumpkin template (see below)
- Battery-powered tea lights
- Carnage: Small rotary tool (optional)
- Scream: Red and golden yellow acrylic yarn, wire pet brush, clothes hanger, scissors, hot glue gun
- Venom: Duct tape, large chenille stem, red acrylic paint, hot glue gun
All templates can be used to carve real pumpkins, but with the additional details for Venom and Scream, craft pumpkins are recommended. A real pumpkin is also suggested for Carnage.
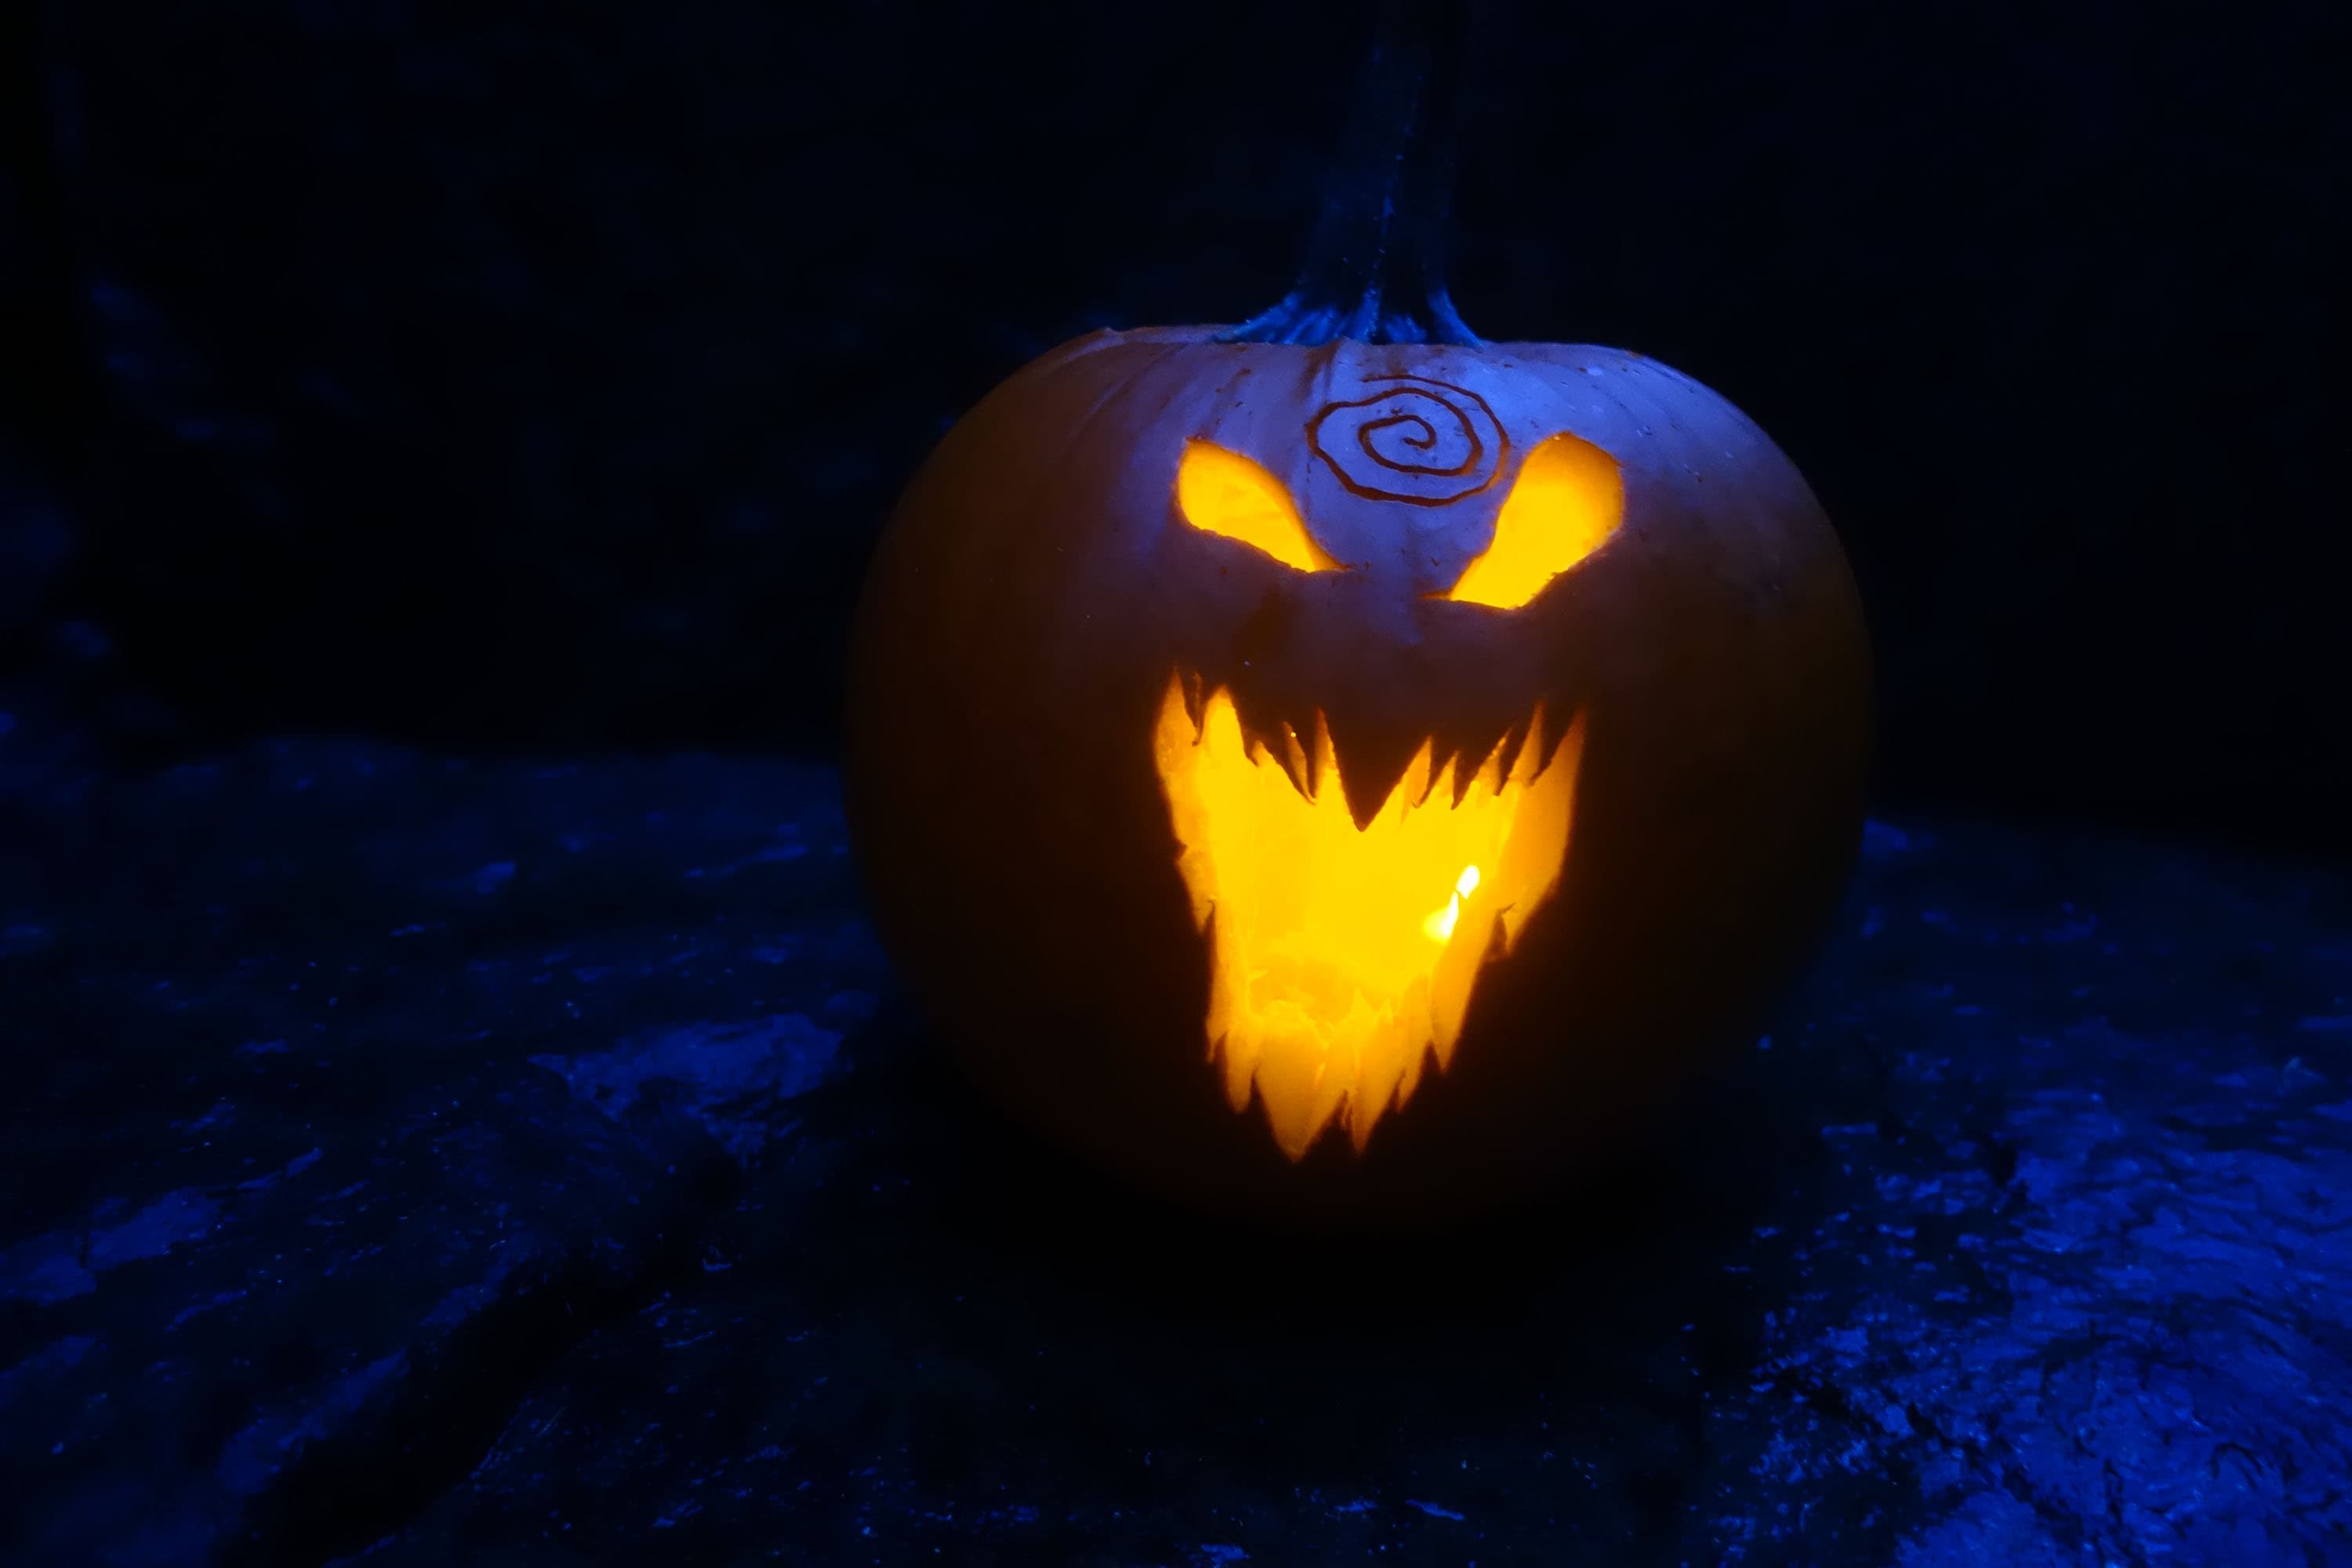
Carnage
Step One: Begin by carving and hollowing out the pumpkin. Remove the seeds and wipe down the outside of the pumpkin.
Step Two: Print the Carnage pumpkin template and cut a large circle around the shapes with plenty of room to spare.
Step Three: Tape the template on the pumpkin, folding the paper as needed to attach it.
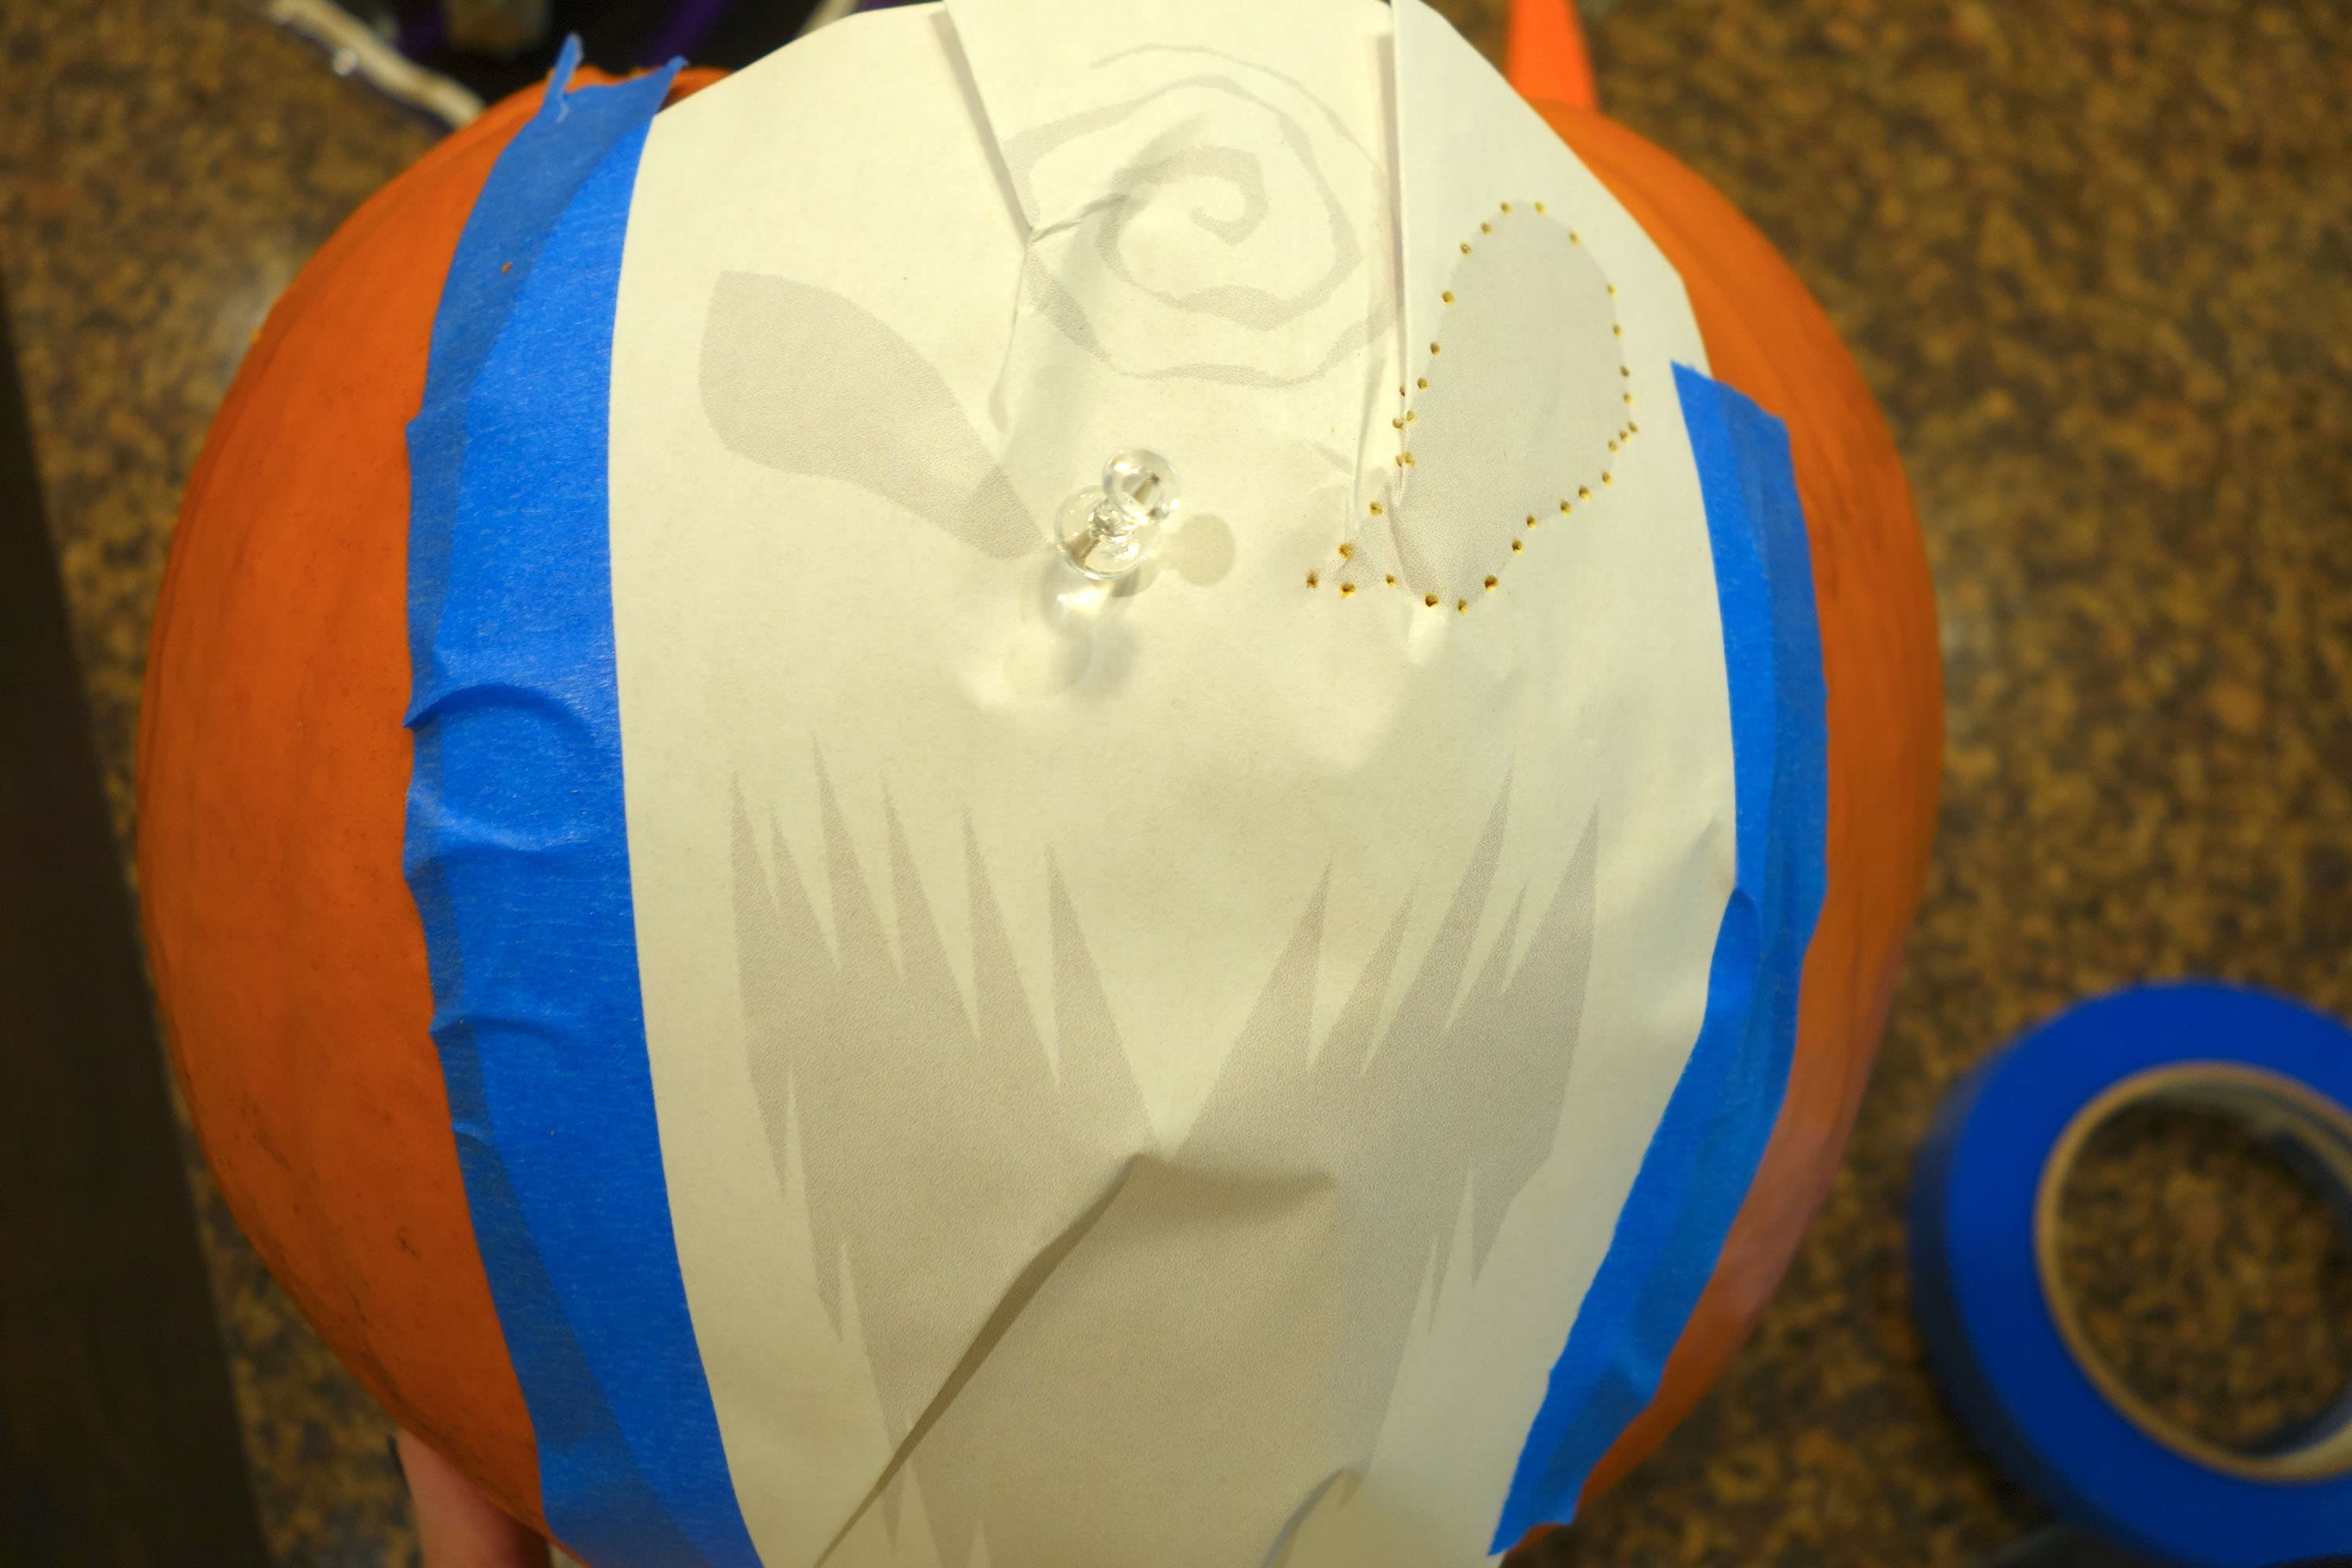
Step Four: Use the pushpin to trace the gray shapes of the template. Push all the way through the paper and into the pumpkin to create visible holes.
Step Five: Remove the template, but don’t discard in case you need to check it for reference as you carve.
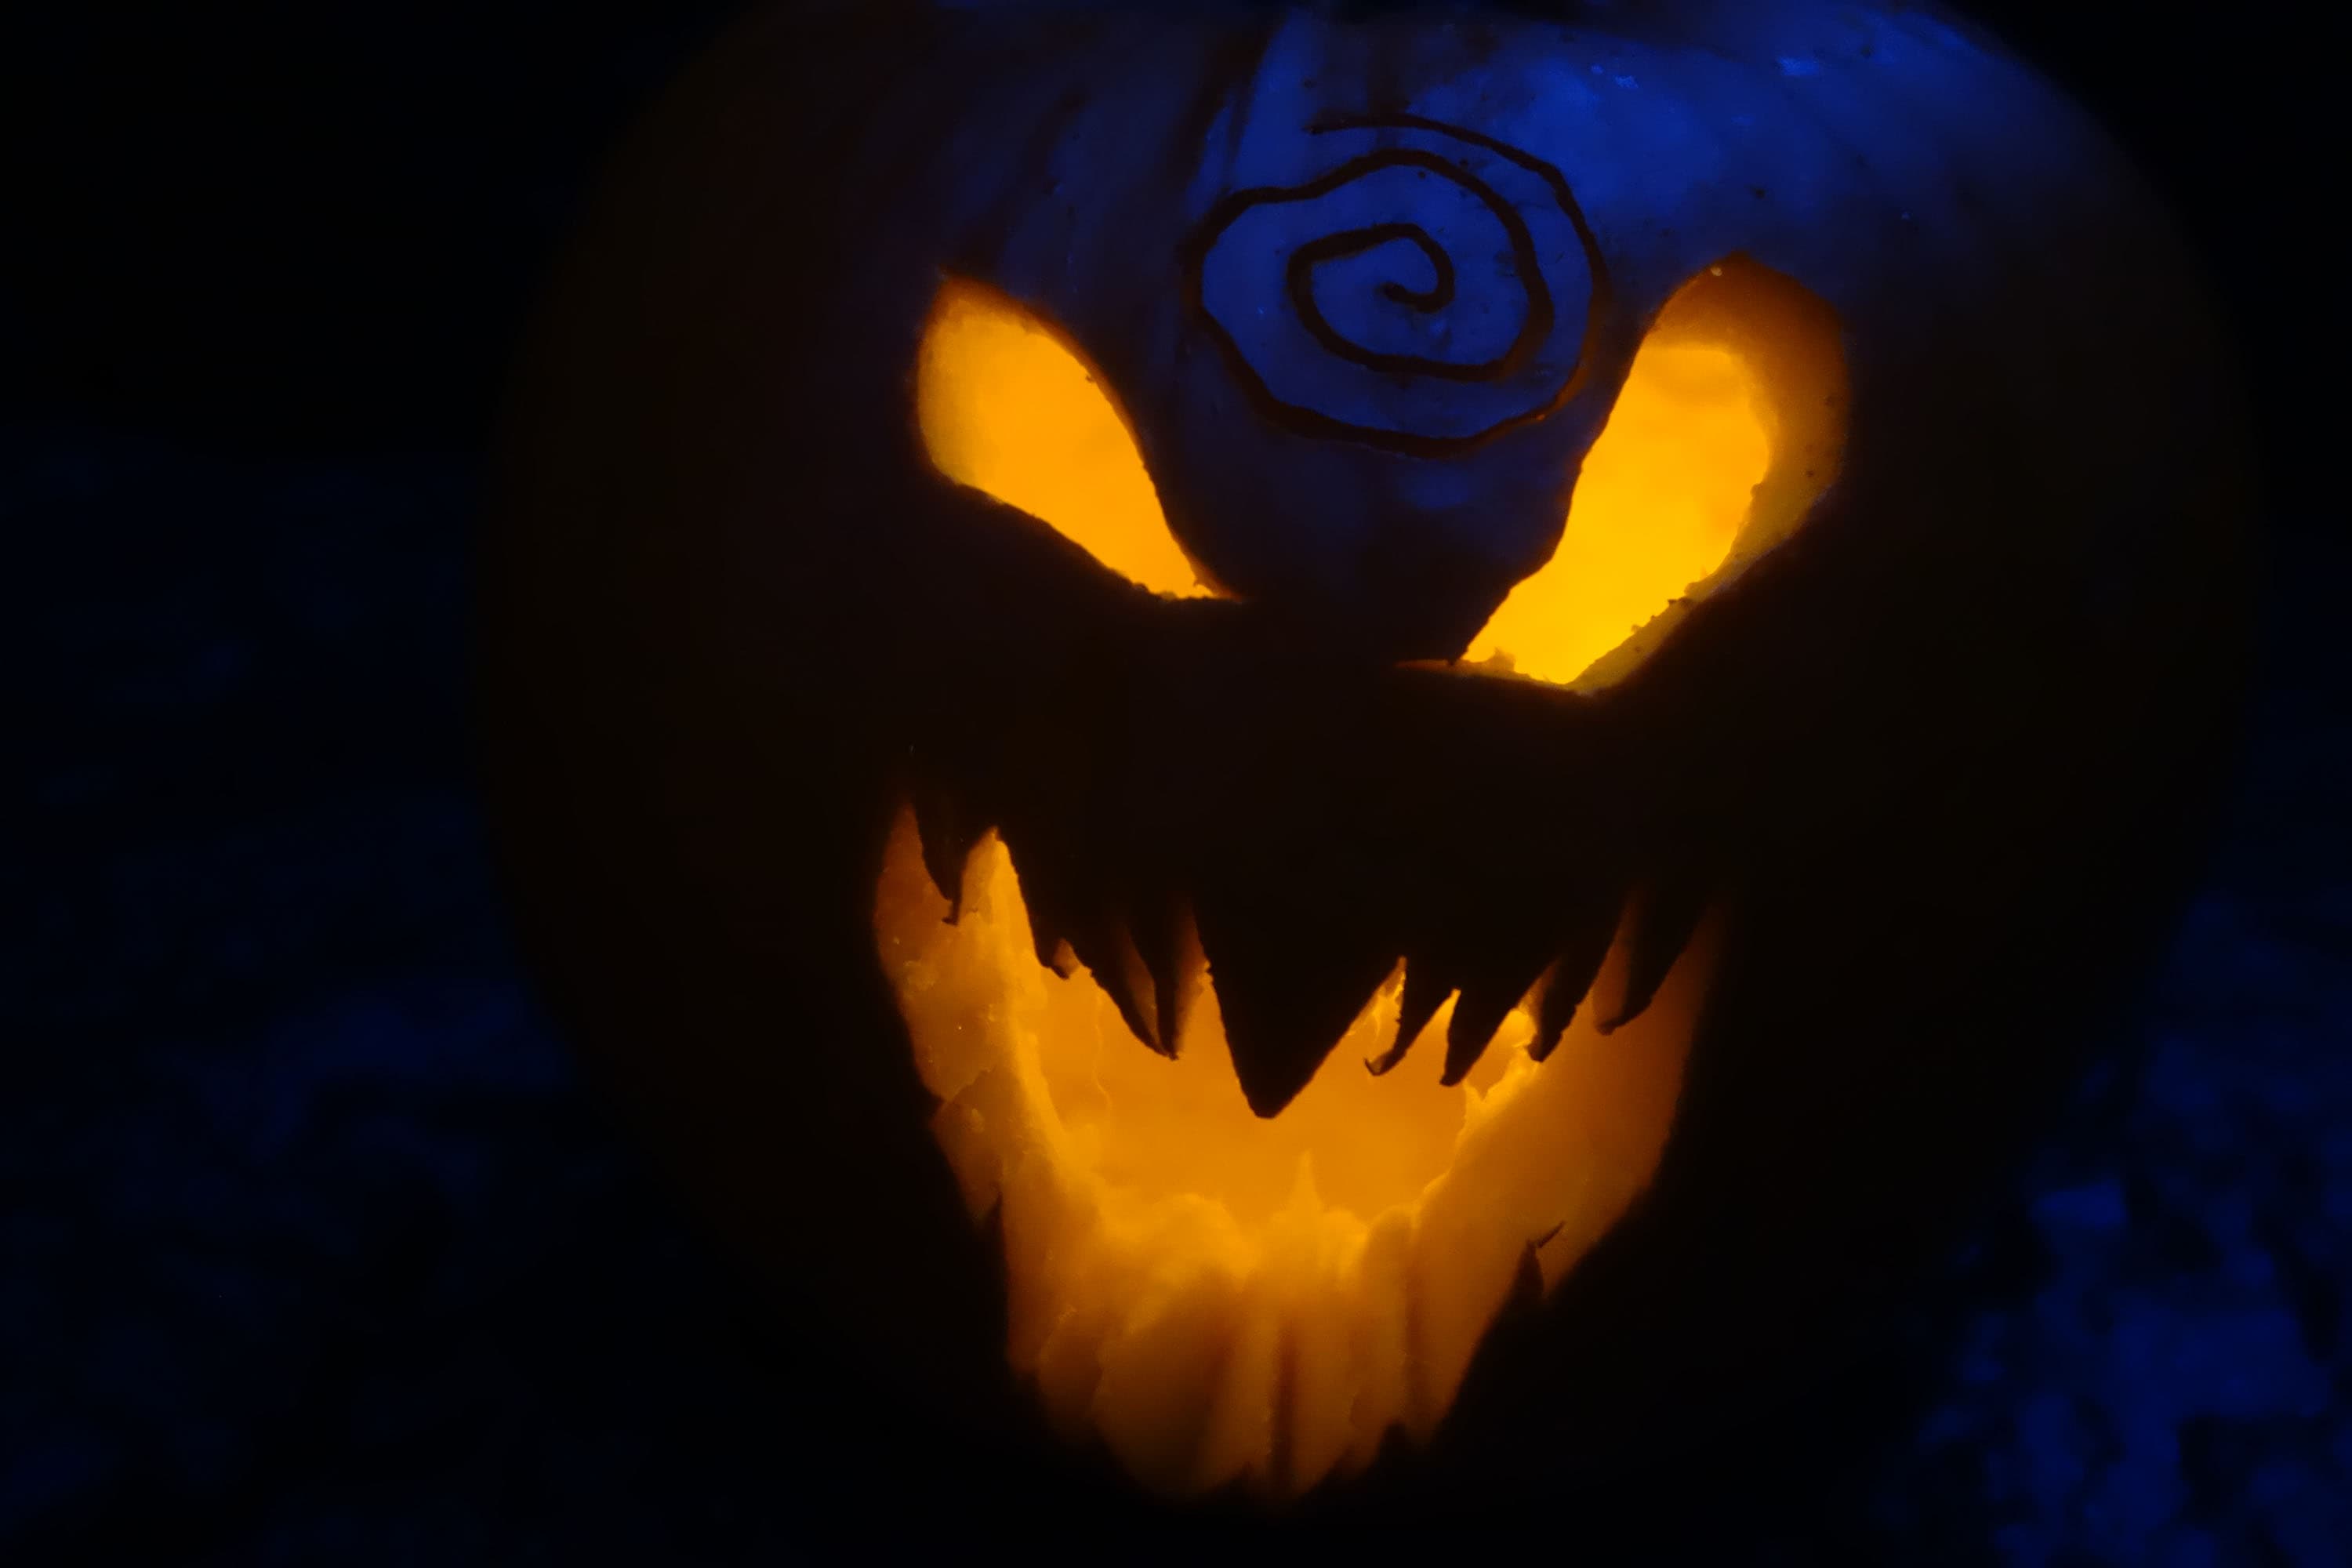
Step Six: Cut out the eyes and mouth shapes, using the dotted lines as a guide, and dispose of the pieces. (If you have strings and jagged pieces inside the jack o’ lantern, don’t worry—it just adds to the creepiness once illuminated!)
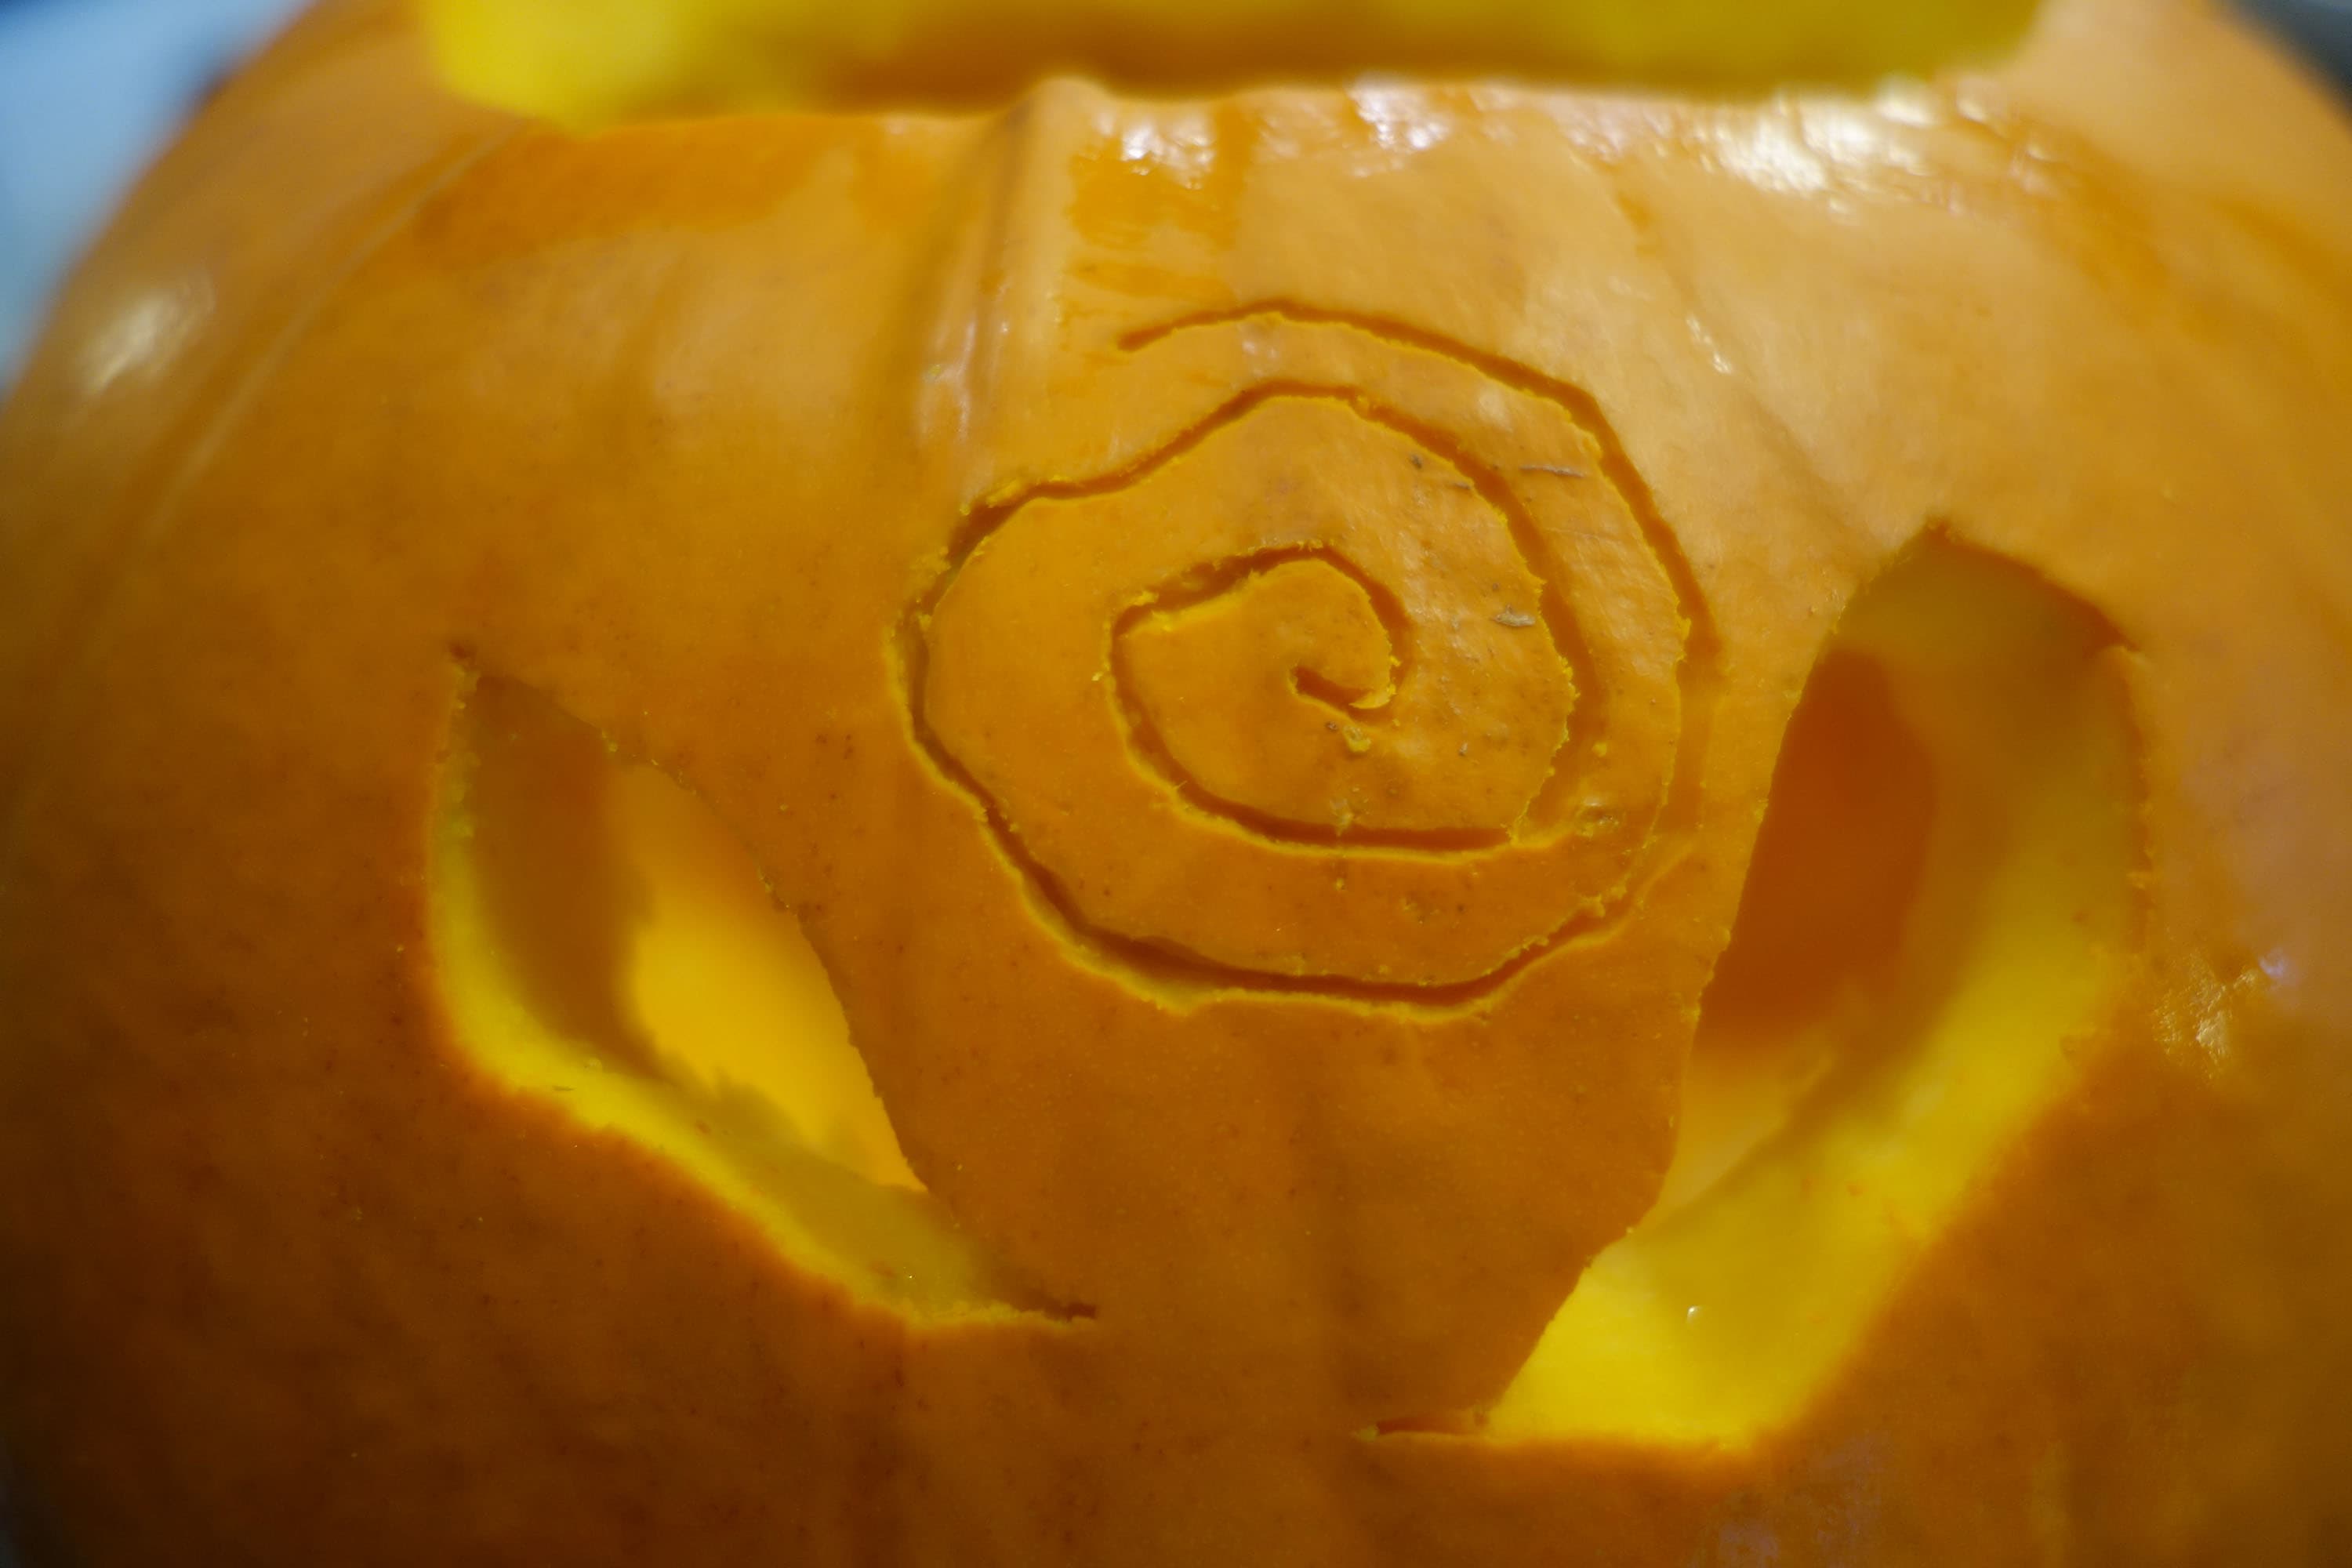
Step Seven: Use a small knife or a small rotary tool to cut out the spiral shape on Carnage’s forehead, using the dotted lines as a guide.
Step Eight: Place a battery-powered light inside, and your Absolute Carnage is absolutely ready to scare some trick-or-treaters.
Scream

Step One: Print the Scream template and use a craft knife to carefully cut out the grey shapes.
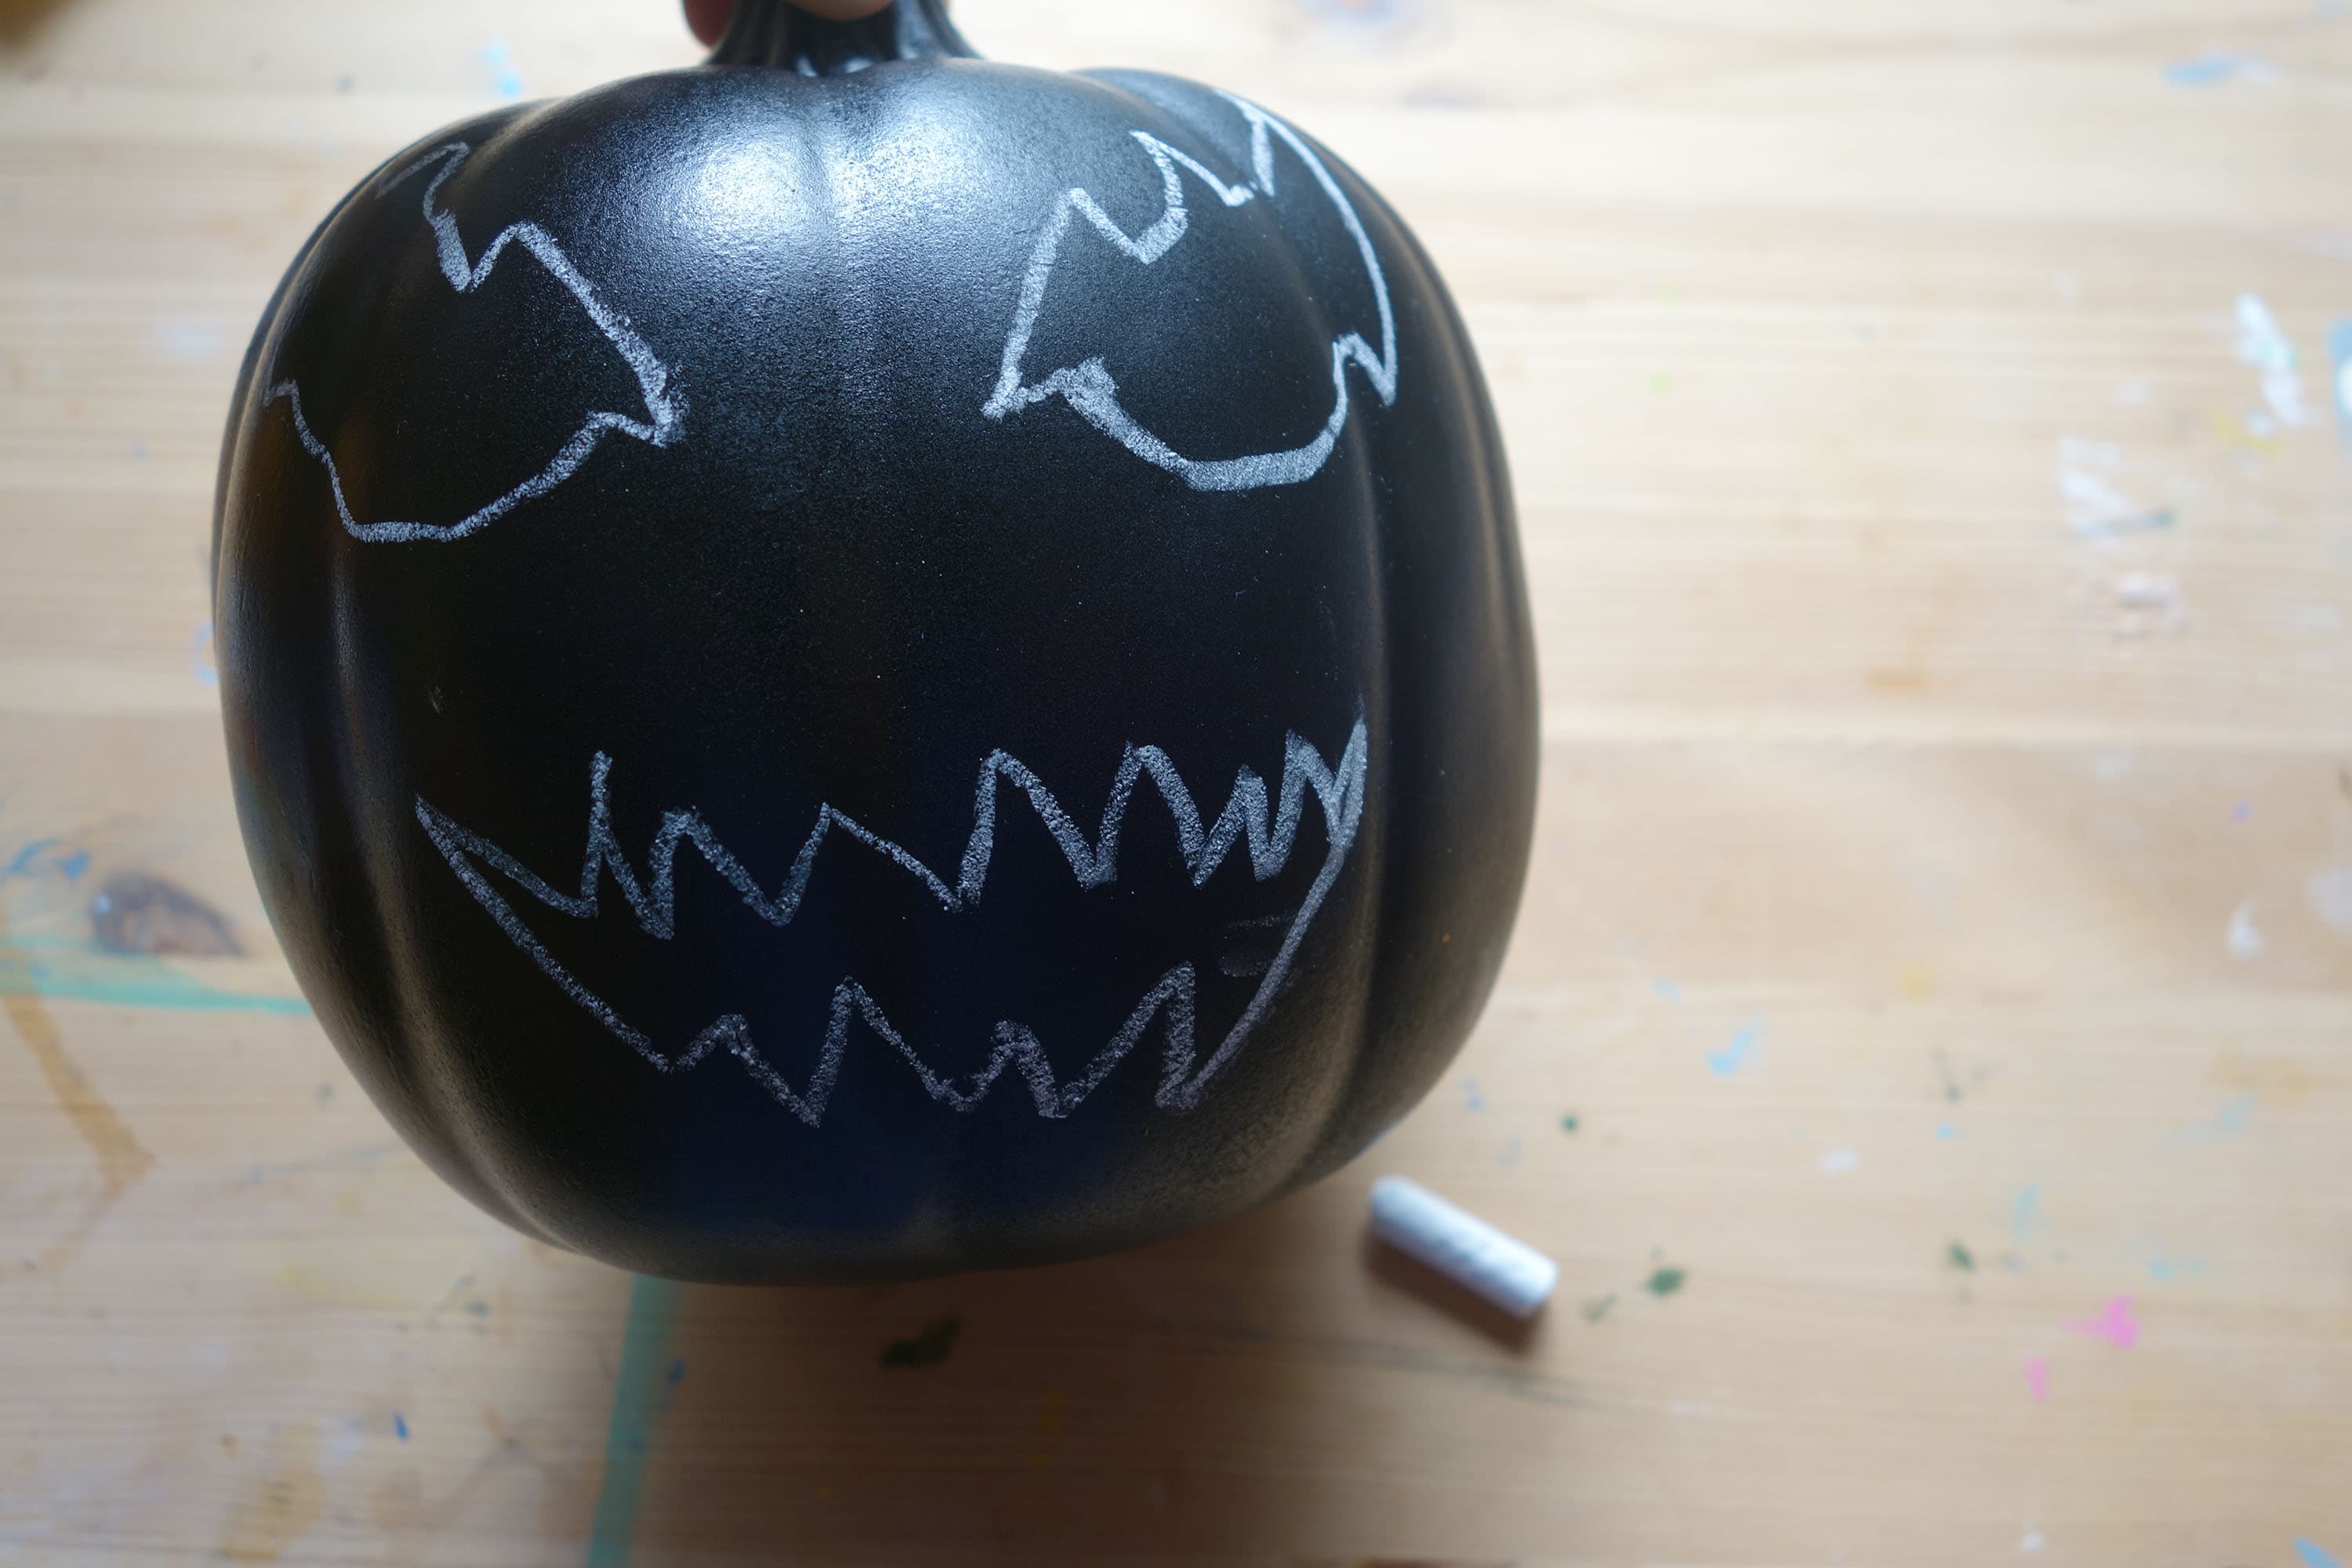
Step Two: Tape the template to a black craft pumpkin. Use a piece of chalk to trace inside the cut shapes, and remove the template.
Step Three: Cut out the traced shapes with a sharp craft knife. Cut a small hole in the bottom of the pumpkin just large enough for a battery-powered tea light to fit snugly.
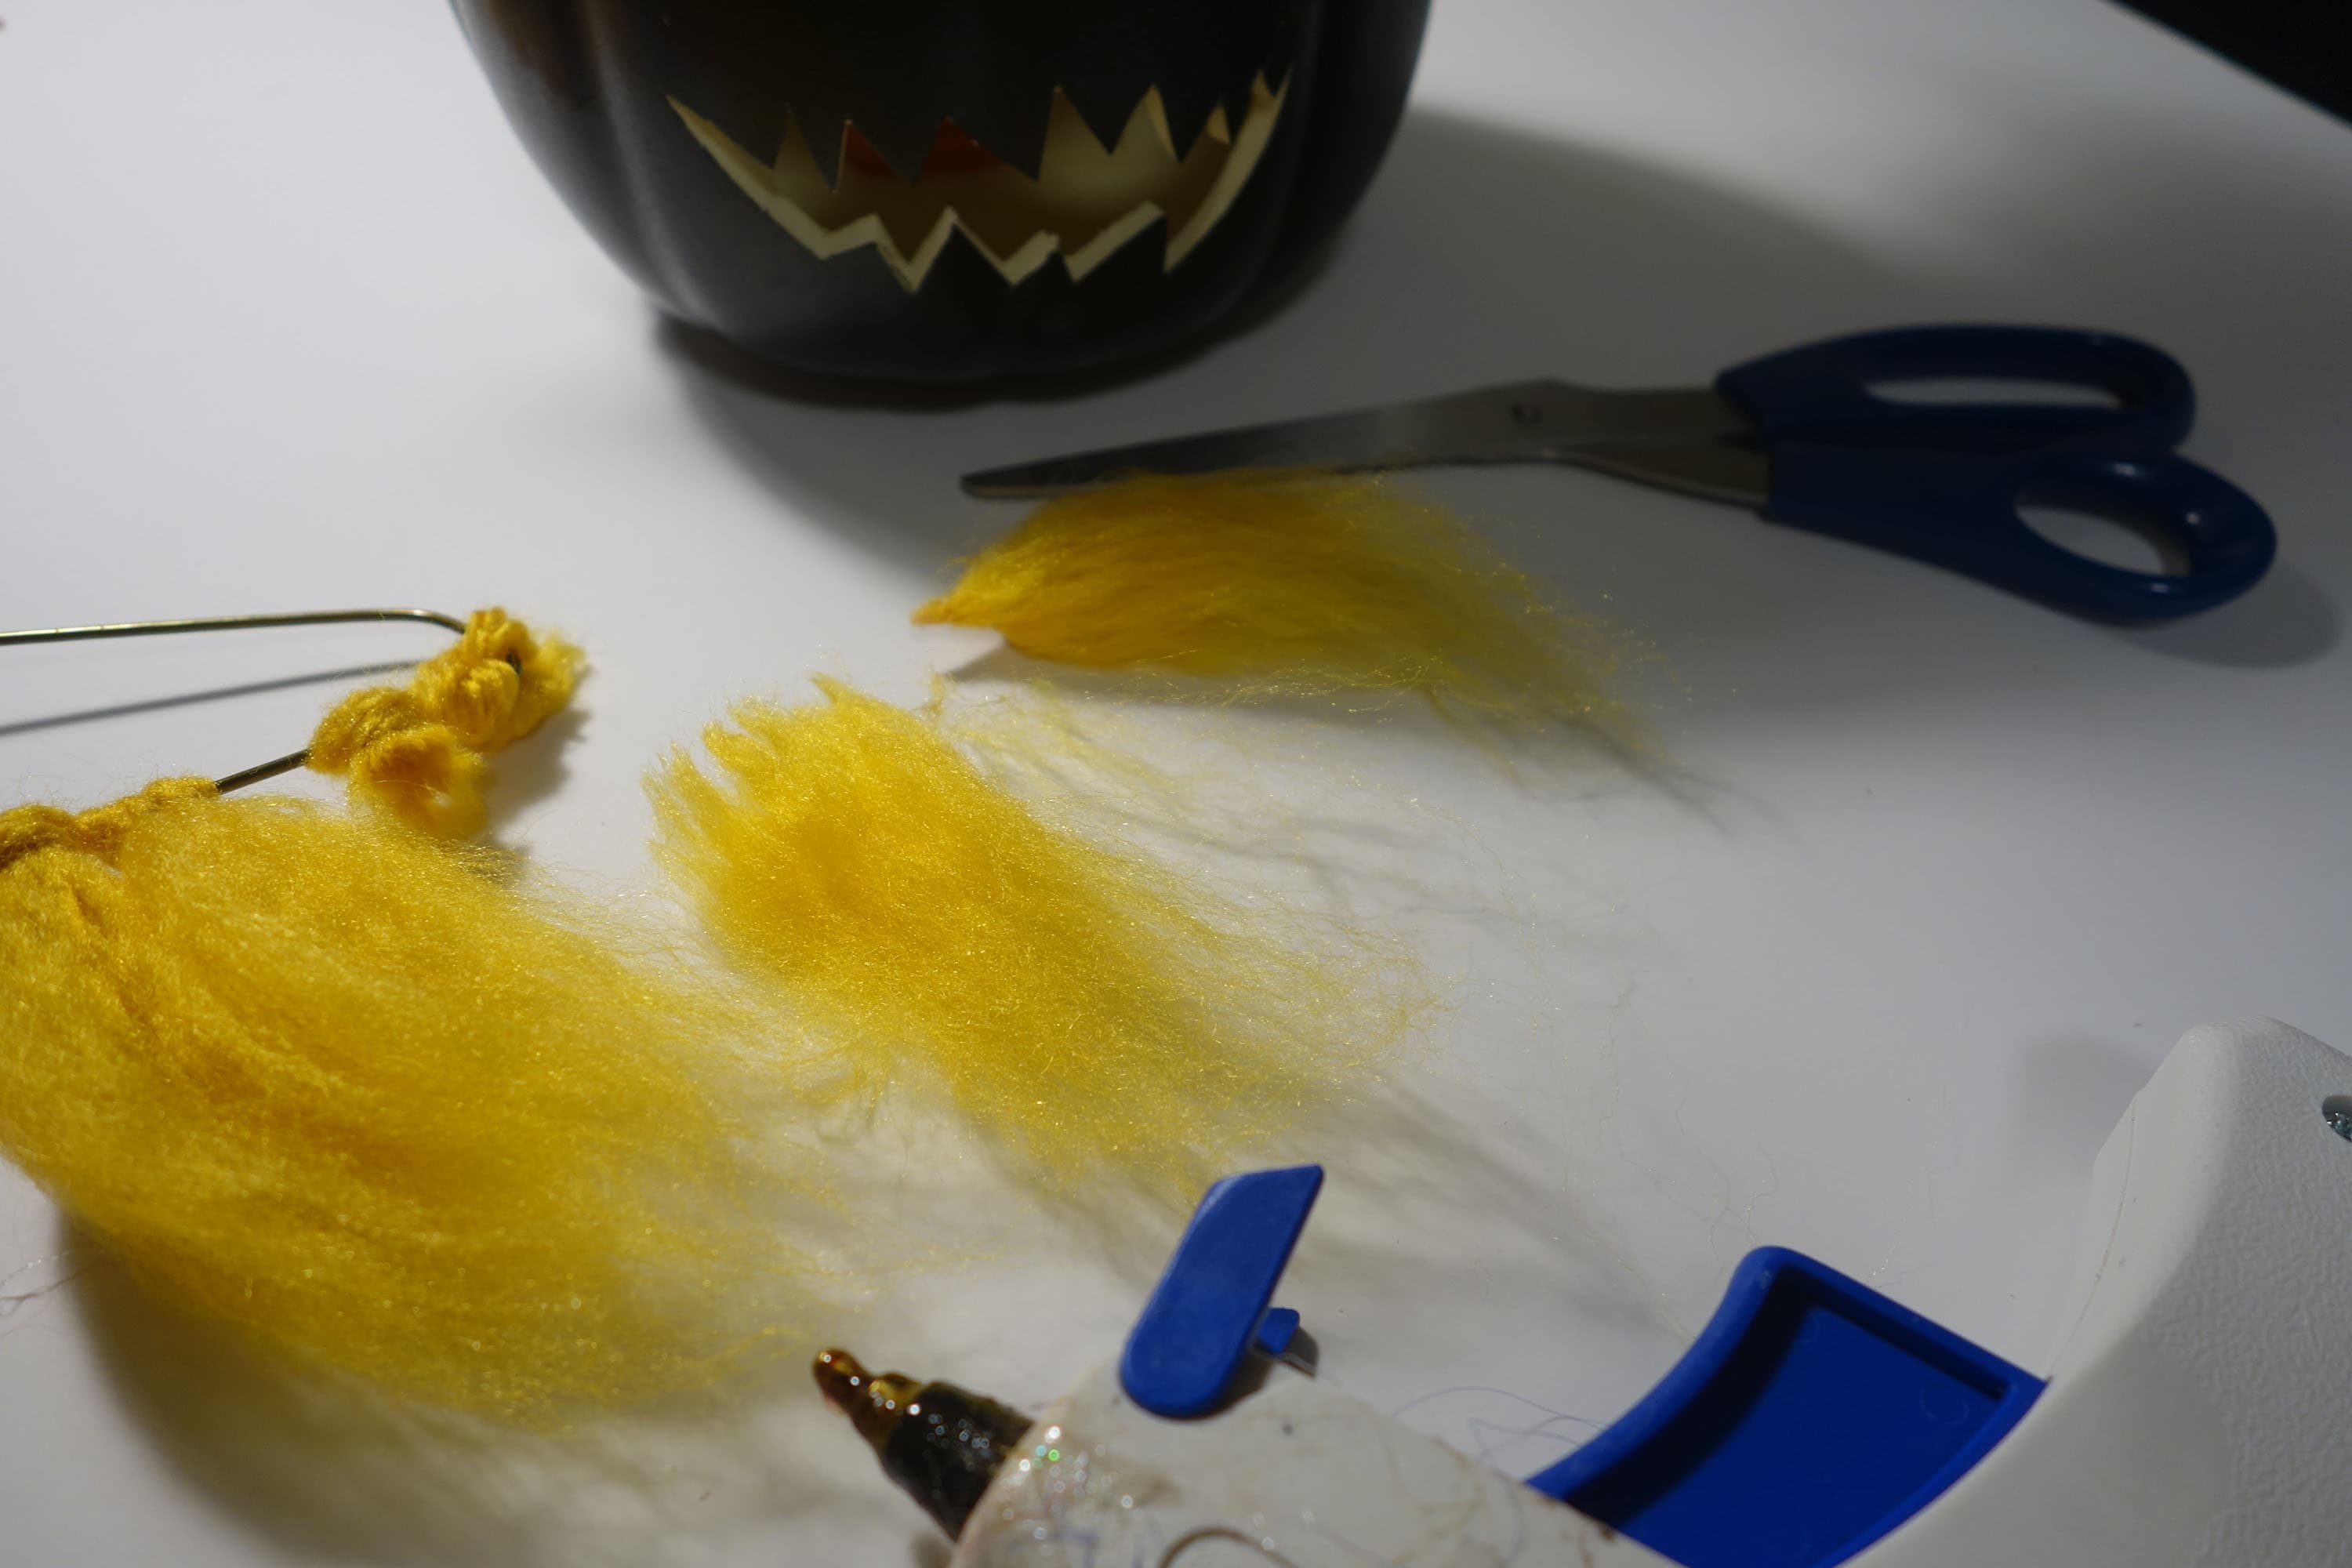
Step Four: Cut several strands of the golden yellow yarn 5-6 inches long and tie them loosely on the clothes hanger. Brush out the yarn with a wire pet brush; hold on to the brushed-out fluff for later. Keep brushing until the yarn resembles hair.
Step Five: Cut the yarn hair from the hanger and place a small amount of glue on the cut end. (If you are using hot glue for this part, let it cool for a few seconds first.) Roll the end of the glued hair until it’s held together. Repeat this process to create about ten pieces of yellow hair.
Step Six: Repeat the process above with the red yarn to create four or five pieces of red hair.
Step Seven: Use the hot glue gun to attach the hair pieces you made to the top of the pumpkin, beginning with the red pieces in the middle. Surround the pumpkin stem until it’s covered with the red hair pieces.
Step Eight: Use the glue gun to finish attaching Scream’s hair. If you would like to fill in the back of the “head” completely with hair, use the discarded yellow yarn fluff to make more hair pieces and hot glue them to the back of the pumpkin.
Step Nine: Insert the battery-powered tea light in the bottom of the pumpkin, and Scream is complete.
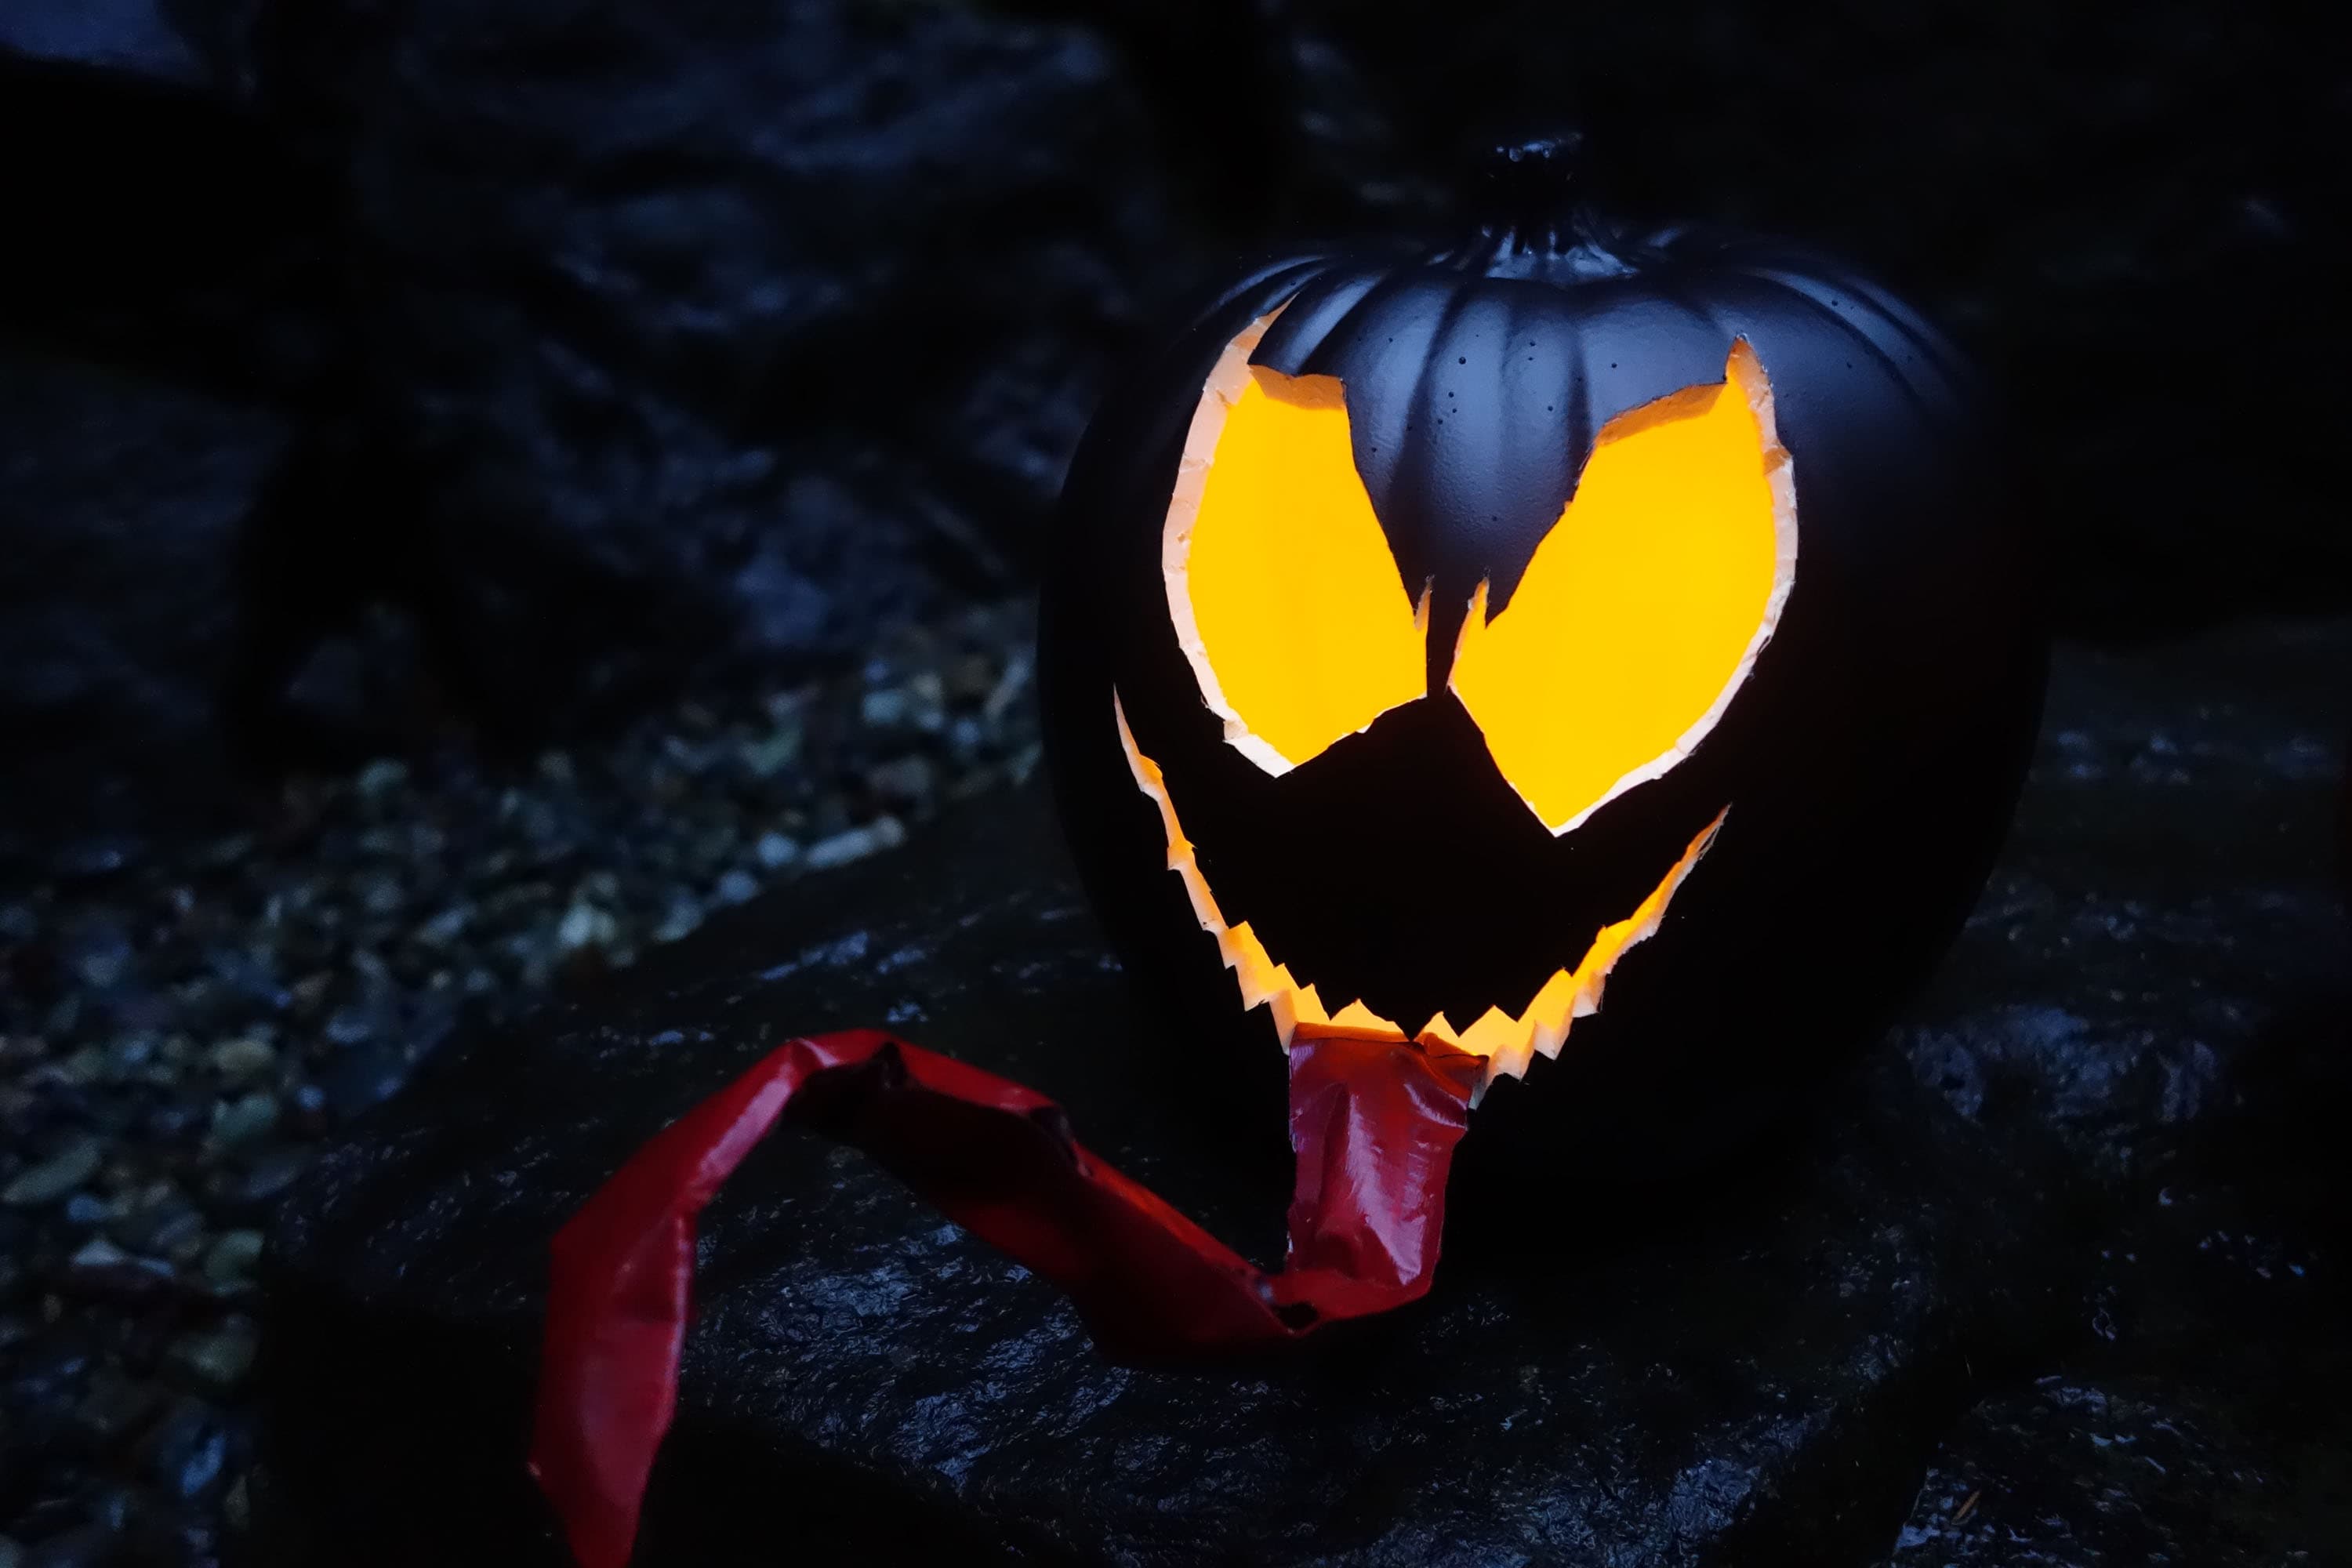
Venom
Step One: Print the Venom template and use a craft knife to carefully cut out the grey shapes.
Step Two: Tape the template to a black craft pumpkin. Use a piece of chalk to trace inside the cut shapes and remove the template.
Step Three: Cut out the traced shapes with a sharp craft knife.
Step Four: Cut a small hole in the bottom of the pumpkin just large enough for a battery-powered tea light to fit snugly.
Step Five: Next, cut two pieces of duct tape that are slightly longer than the large chenille stem. Place the stem in the center of one strip (sticky side facing up), and then firmly press the other piece of duct tape (sticky side down) to sandwich it.
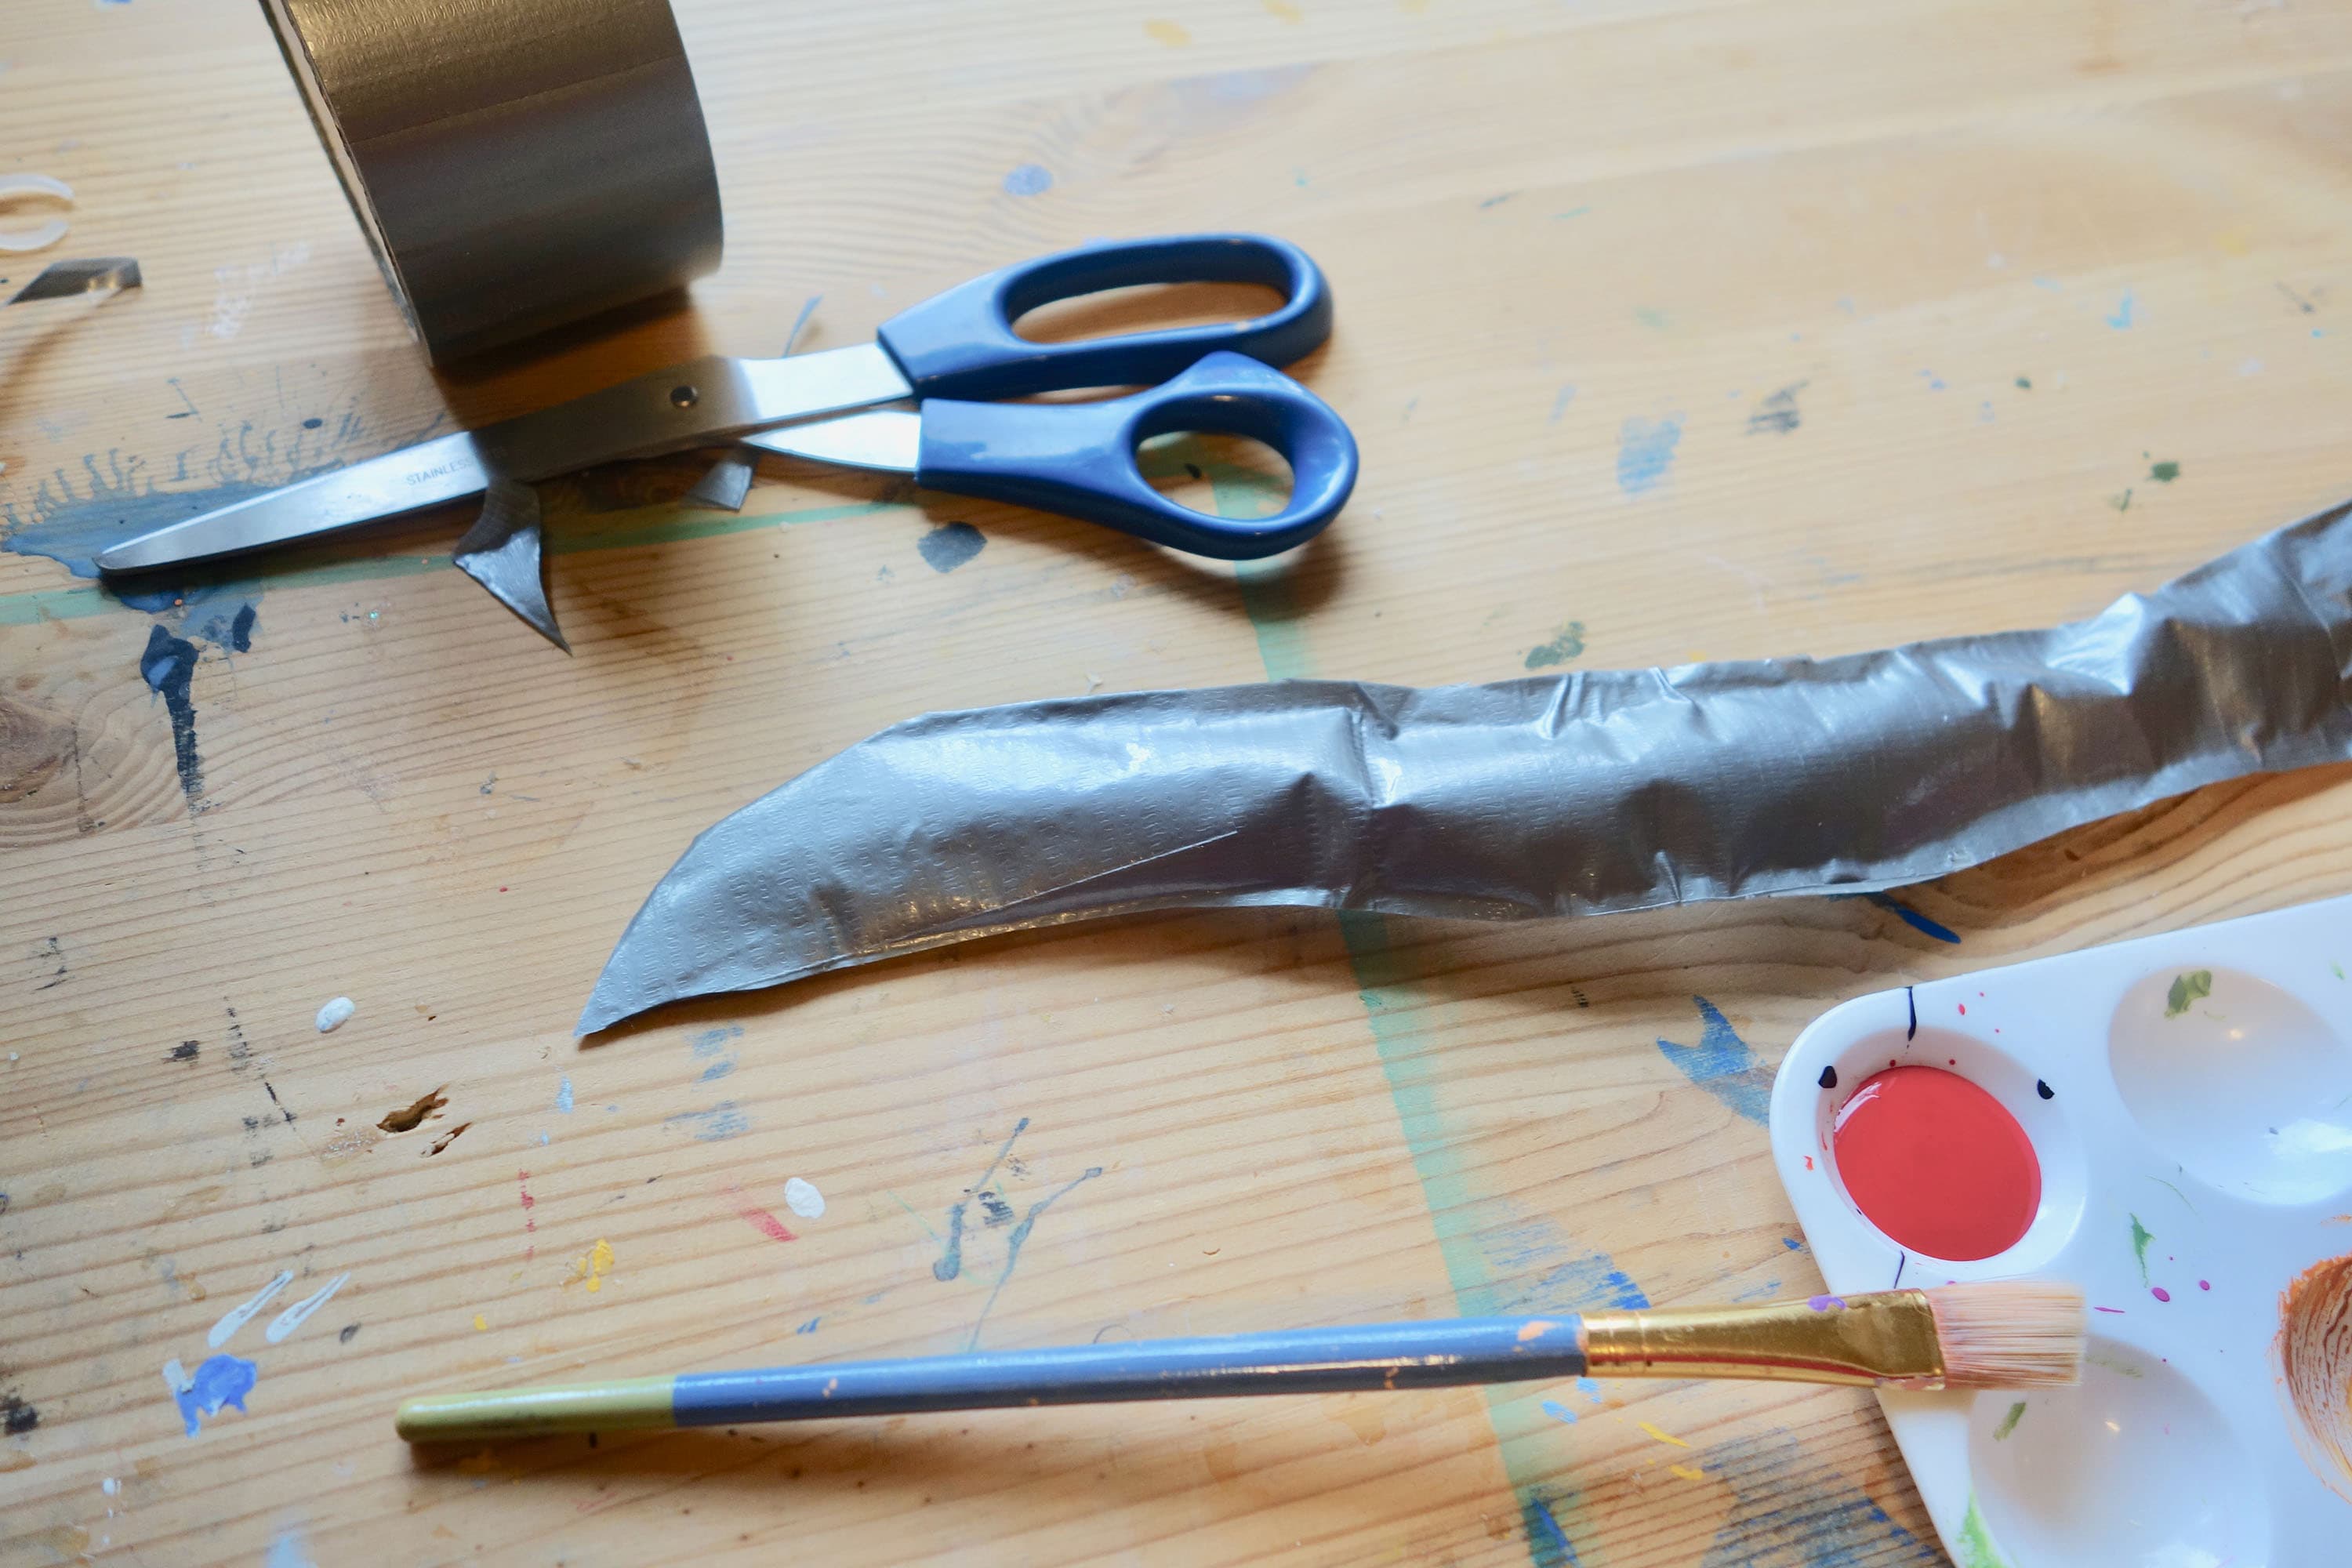
Step Six: Cut around the stem and tape to make a long tongue shape pointed on one end. You may need small pieces of additional tape to close any edges that aren’t sealed after cutting.
Step Seven: Paint both sides of the tongue red with red acrylic paint or red spray paint. Let dry.
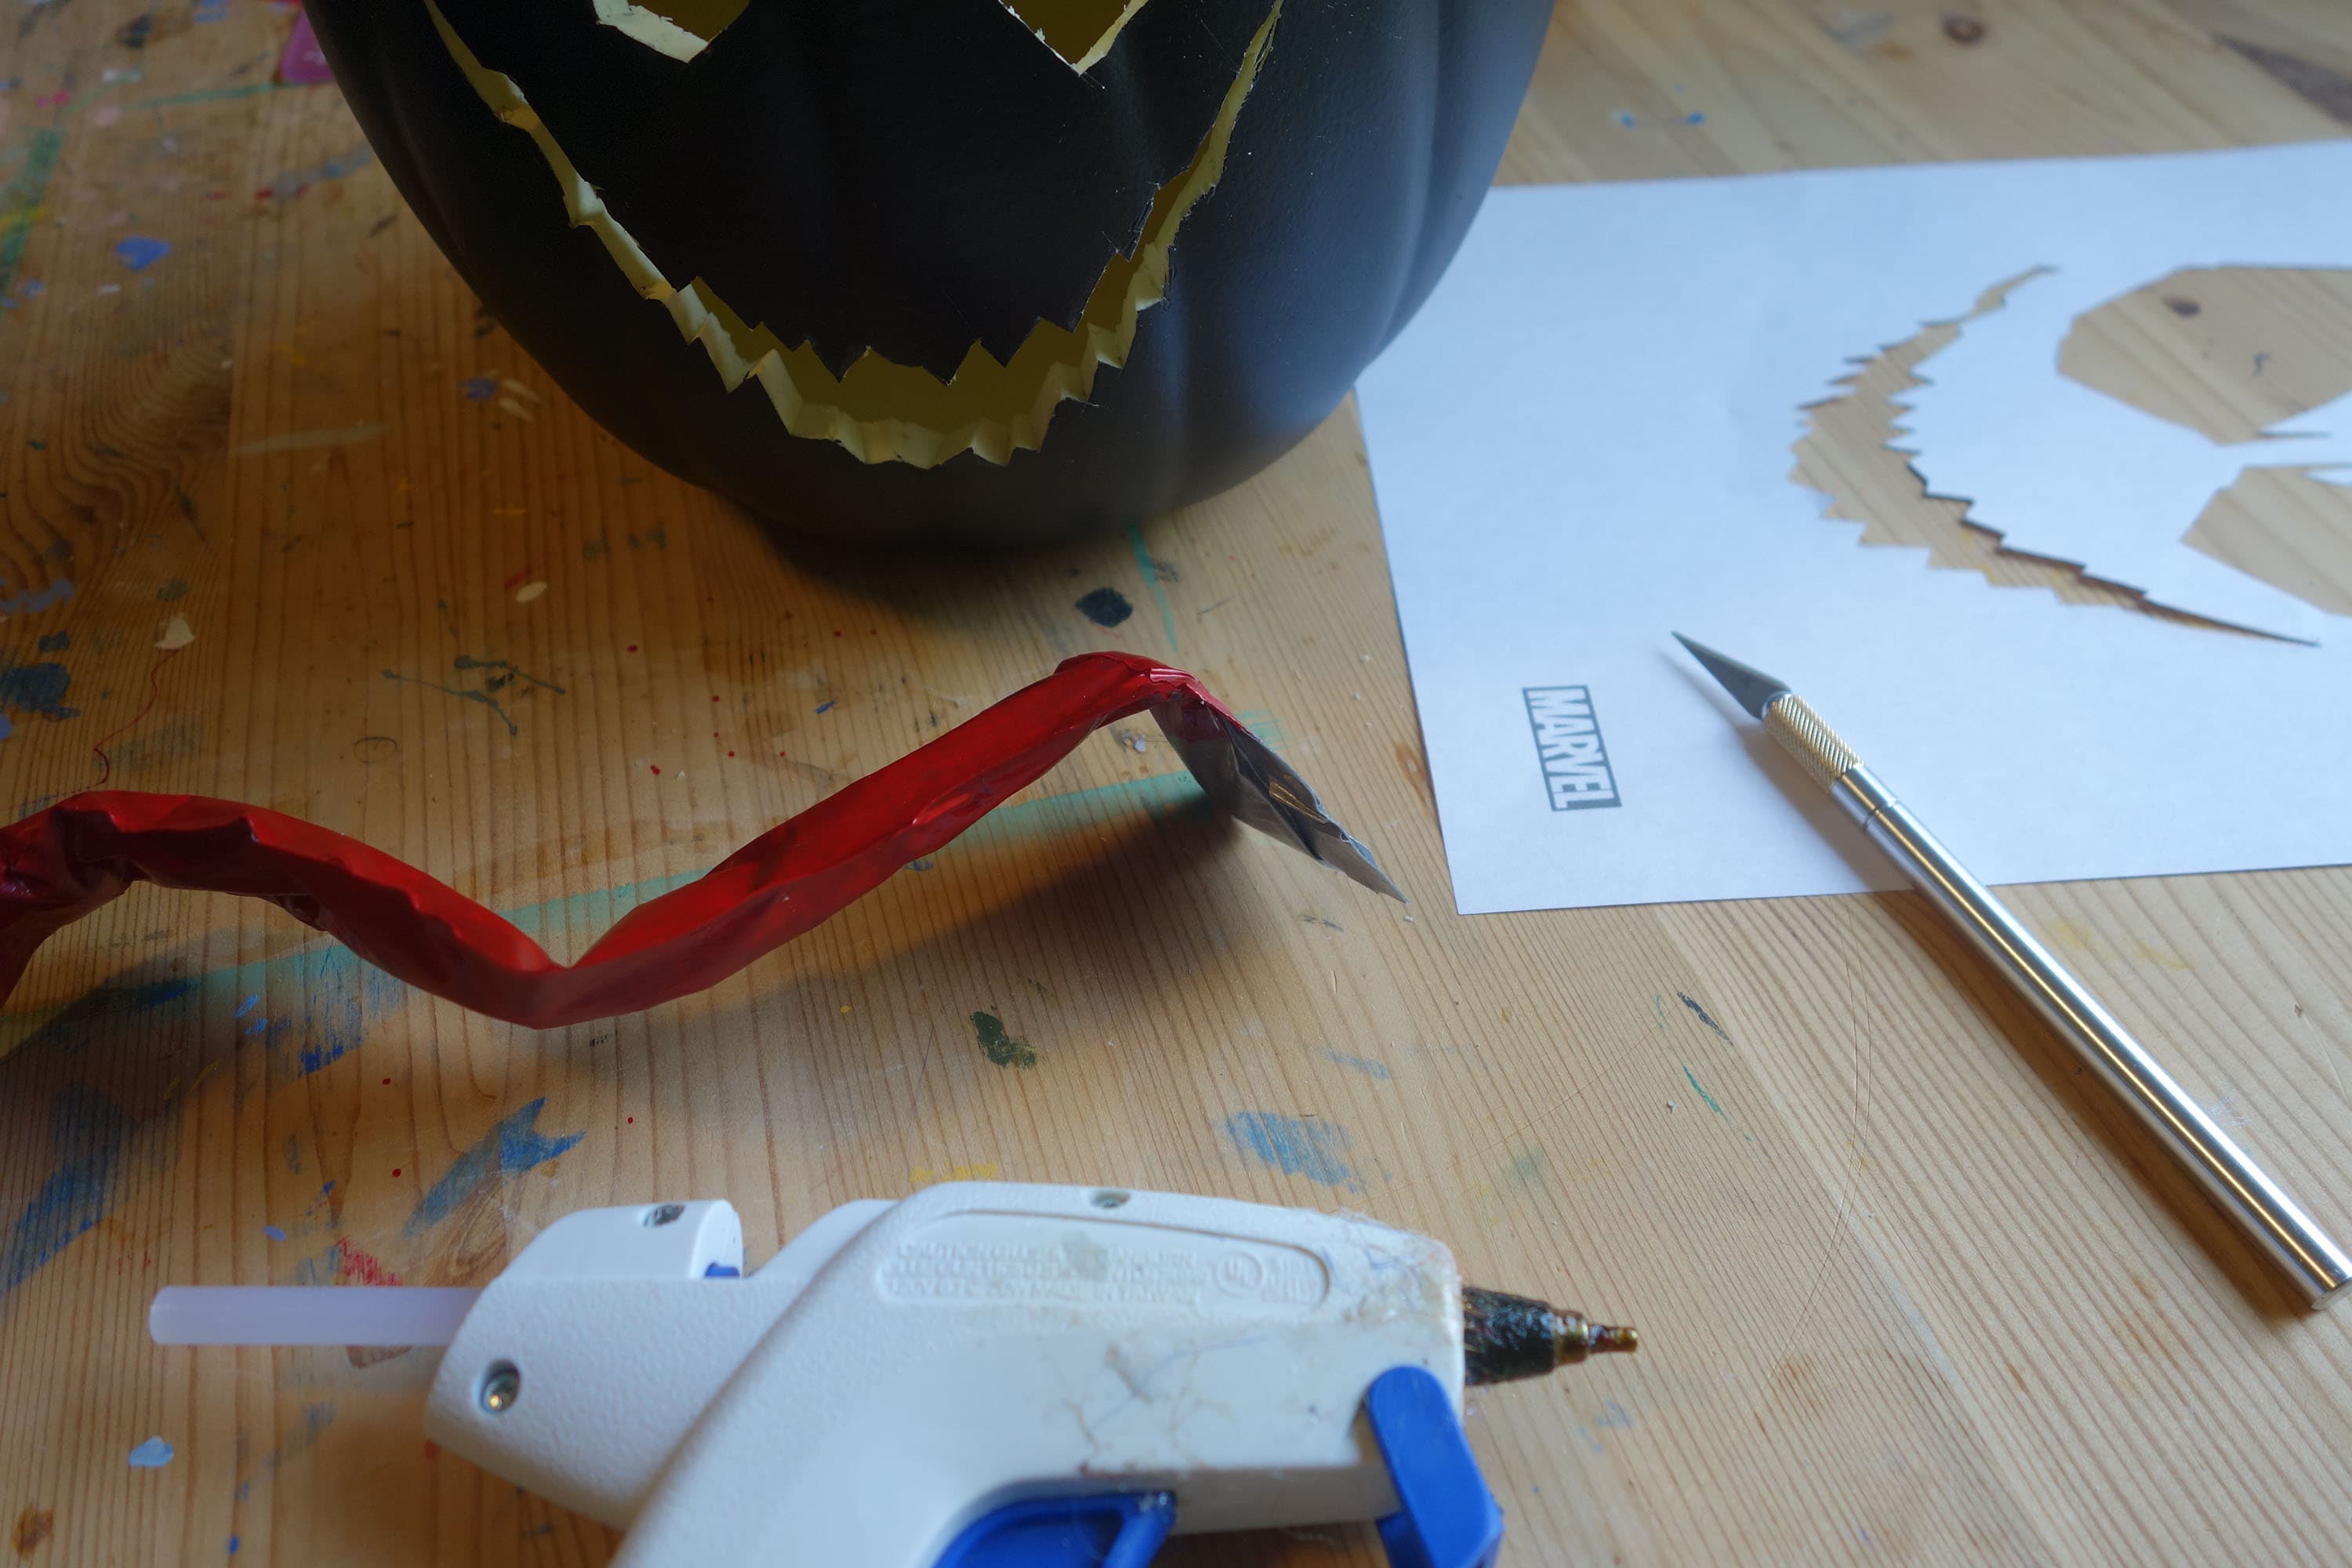
Step Eight: Bend the wire to complete the tongue, and carefully glue the flat, non-pointy side down inside the craft pumpkin’s “mouth.”
Venom is complete!
To go from pumpkins to pages, check out the latest news about Marvel's sinister symbiote event, ABSOLUTE CARNAGE!
The Daily Bugle
Can’t-miss news and updates from across the Marvel Universe!